Heavenly Chocolate Rolls with Luscious Icing
Craving something extraordinary? Discover how to bake chocolate rolls with decadent icing that will fill your kitchen with blissful aromas—perfect for any occasion!

- look into into Deliciousness: Bake Chocolate Rolls with Decadent Icing
- Essential Ingredients Guide for Baking Chocolate Rolls
- Mastering Professional Cooking Methods: Your Guide to Baking Chocolate Rolls
- Pro Tips & Secrets
- Perfect Presentation
- Storage & Make-Ahead
- Creative Variations
- Complete Nutrition Guide
- Expert FAQ Solutions
- In Conclusion
- Recipe Card
look into into Deliciousness: Bake Chocolate Rolls with Decadent Icing
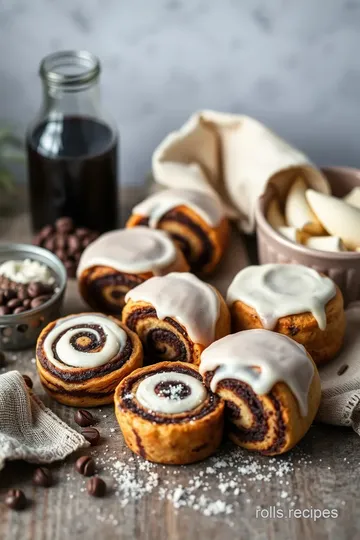
Oh my gosh, let me tell you about a moment that made my weekend! picture this: i had a lazy saturday ahead of me, and what better way to kick it off than with fresh, warm pastries? that was when i decided to bake chocolate rolls with decadent icing .
Chocolate just makes everything better, right? i dove into my kitchen, ready for some delicious chaos . and trust me, it didn’t disappoint!
Recipe Overview: From Simple to Spectacular
Now, these chocolate rolls are not just any rolls—they're a comforting little hug in pastry form. historically, sweet rolls have roots in various cultures.
They’ve been a staple in both europe and america, evolving to the scrumptious chocolate goodness we adore today. and let’s be real, who doesn’t love soft, fluffy rolls topped with warm homemade chocolate icing?
In today’s fast-paced world, everyone seems to be searching for those classic sweet roll recipes . they’ve gained massive popularity thanks to brunches and even lazy breakfast feasts.
The best part? you’ll need about 1 hour and 15 minutes to make these beauties, and while the process may seem a tad challenging, it’s totally worth it.
Don’t worry if you’re a beginner; this is an easy chocolate roll recipe with step-by-step baking guide. it'll feel like a culinary win!
Cost-wise, making these rolls at home is budget-friendly—especially when fed to your friends and family. Trust me, they won’t know you spent just a few bucks on ingredients.
Key Benefits: Oh, the Sweet Joys!
Let’s chat about benefits! first off, these soft chocolate rolls bring a whole lot of joy to your breakfast table.
They’re more than just eye candy; they’re packed with comforting flavors that lift spirits. nutrition highlights include a bit of protein from the eggs and some whole grains if you use whole wheat flour!
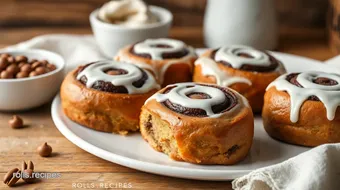
Also, if you think chocolate is only for dessert, think again! these rolls are the perfect brunch treat . imagine how happy everyone will be when you present a plate of warm pastries with chocolate dripping with luscious icing while everyone sips their coffee.
You’ll have “hostess of the year” on your resume!
There’s something special you should know: these rolls are versatile! while some use chocolate chips, there are a ton of flavored roll fillings you can tinker with.
How about adding peanut butter or even swapping in nuts? you can easily personalize your chocolate roll recipe to satisfy everyone’s sweet tooth.
Seriously, this is one of those gourmet chocolate recipes that feels fancy but is super family-friendly.
Transition to Ingredients: Let’s Get Cooking!
So are you ready to whip up some magic? let’s get to work on gathering all our baking essentials and ingredient list! from all-purpose flour to that rich chocolate icing, you’re about to make something truly unforgettable.
And it all starts with a simple mix of flavors and a little bit of patience. buckle up—this is going to be delectable!
Remember, you're not just baking chocolate treats; you're creating memories. Ready for the adventure? Let’s dive into the ingredients and start our baking journey!
Essential Ingredients Guide for Baking Chocolate Rolls
When it comes to baking, having the right ingredients is everything. you want your chocolate roll recipe to shine, right? let’s break down the essentials so you can whip up the softest, most delicious rolls, topped with that decadent icing everyone’s raving about.
Premium Core Components
First off, let's dive into the measurable details of your ingredients. For those used to working with measurements, here’s a quick friendly conversion:
- For Dry Ingredients : 1 cup all-purpose flour = 120g
- Liquid Measurements : 1 cup water or milk = 240ml
When shopping, look for quality indicators that hint at freshness. for flour, check the package date; for yeast, it should be active and not expired.
Storage plays a big role too: keep flour in a cool, dark place, and your yeast in the fridge after opening for longevity.
Clearly, freshness tips could turn your average chocolate treat into a mouthwatering masterpiece.
Signature Seasoning Blend
Now let’s talk signature spice combinations . for these chocolate rolls, a hint of ground cinnamon can elevate the chocolate flavor to another level.
You can’t go wrong with pairing herbs like vanilla extract or a dash of sea salt, which boosts all the flavors.
Remember, baking isn't a one-size-fits-all gig. Different regions have unique twists! Ever tried a pinch of chili powder for a Mexican flair? It’s a game-changer, folks!
Smart Substitutions
We’ve all been in a pinch. What if you discover you’re out of an ingredient? Don’t fret! Here’s where common alternatives come into play.
Got no butter ? Use coconut oil! Need a dairy-free option? Try almond milk in place of regular milk. These little tweaks can get you going without skipping a beat.
If you have a dietary restriction, like gluten-free needs, swap all-purpose flour with a good gluten-free mix . Seriously, you’ll still have those warm delicious rolls everyone loves!
Kitchen Equipment Essentials
Now let’s set up your workspace . You really don’t need a fancy kitchen to make these easy chocolate rolls . Just gather some must-have tools:
- Mixing Bowls : A large one for the dough and a smaller one for the icing.
- Rolling Pin : Crucial for shaping those rolls just right.
- Baking Sheet : Make sure you line it with parchment paper for easy cleanup.
Worried about storage solutions? Keep your baking tools neatly organized. A simple drawer can keep all your measuring cups and spoons in one place!
Transition to Baking Chocolate Rolls
With all those essentials sorted, you're well on your way to creating something magical. when you finally decide to bake chocolate rolls with decadent icing , remember: there’s a world of flavors waiting for you! you’ve got the fluffy dough tips , the ingredients, and the right tools—now it's time to put that knowledge to good use.
Let’s dig into the step-by-step baking guide, where the real fun begins! grab your ingredients, roll up your sleeves, and prepare for an adventure in chocolate pastry baking that’s perfect for breakfast or dessert! who wouldn’t love a batch of homemade chocolate icing drizzled over soft chocolate rolls ? trust me, your friends and family will be singing your praises over these comforting chocolate treats.
Happy baking, my fellow dessert lovers!
Mastering Professional Cooking Methods: Your Guide to Baking Chocolate Rolls
Baking can feel daunting sometimes, right? but if you buckle down with some professional cooking methods , you’ll be whipping up heavenly goodies in no time.
Today, let’s take a trip down the delicious lane of baking chocolate rolls with decadent icing . we’re talking about those soft, fluffy chocolate rolls that scream comfort food.
Grab your apron; we're diving into this mouth-watering adventure!
Essential Preparation Steps
First off, before we even think about cranking up the oven, let’s chat about some essentials to get you organized.
Mise en place is your best friend here, which is a fancy chef term that means “everything in its place.
” lay out all your ingredients and tools (like mixing bowls and measuring cups) so you’re not scrambling for flour while trying to knead dough.
Time management is also key. always check how long things will take. for our rich rolls, you've got about 20 minutes of prep, 30 minutes of resting , then 25 minutes of baking .
You want to make sure your timing is spot-on so those rolls don’t over-proof or bake unevenly.
When it comes to organization , think about your workspace. clean as you go! it makes everything feel less chaotic, and trust me, when you're icing those rolls, you don’t want flour all over the counter.
Safety first, folks! Always remember to handle hot pans carefully and keep those kitchen towels nearby to prevent accidents. Nobody likes a trip to the ER over a chocolate disaster!
Step-by-Step Process
Alright, let’s get into the nitty-gritty of this chocolate roll recipe.
-
Prepare the dough : start by mixing together 4 cups of flour, ¼ cup of sugar, 2 teaspoons of instant yeast, and 1 teaspoon of salt in a big bowl.
Then, whisk together 1 cup of warmed milk , ¼ cup of melted butter , and 2 eggs in another bowl.
Combine them till a dough forms, then knead for about 5- 7 minutes on a floured surface.
-
First rise : place that dough in a greased bowl, cover it, and let it rise for 1 hour or until it’s doubled in size.
You'll know it’s ready when it feels puffy and soft to the touch.
-
Prepare the filling : in the meantime, mix ¾ cup of brown sugar , ⅓ cup of cocoa powder , and ½ cup of chocolate chips .
If you want a pop of flavor, add in a teaspoon of cinnamon!
-
Shape the rolls : once your dough has risen, punch it down—this is an oddly satisfying step! roll it into a rectangle, spread the filling, then roll it up tight.
Slice those beauties into 12 pieces and place on a lined baking sheet.
-
Second Rise : Cover them with a towel again and let rise for another 30 minutes . Don’t rush this step!
-
Bake : Preheat your oven to 350° F . Bake for 25 minutes or until golden brown. You want them springy to the touch!
-
Make that icing : while they cool, whisk together 1 cup of powdered sugar , 2 tablespoons of cocoa powder , 2-3 tablespoons of milk , and 1 teaspoon of vanilla until it’s nice and smooth.
Expert Techniques
Cooking is partly about understanding techniques. you may encounter some bumps along the road, but here are a few troubleshooting tips .
If your rolls didn’t rise properly, the yeast could have been expired, or your milk might have been too hot—remember, warm, not scalding!
To ensure quality, check the rolls during baking. They should have a golden-brown hue when done, and the edges will be slightly crisp—a visual cue for perfection!
Success Strategies
Now, let’s avoid some classic flubs. don’t rush your rises; they help develop that moist texture we crave in soft chocolate rolls .
Also, don’t skip the resting time; i know it’s tempting to dive right in!
If you want to prep ahead, you can roll up the dough the night before and pop them in the fridge to bake fresh in the morning.
That’s an easy brunch recipe for your friends!
Wrapping Up
Baking chocolate rolls with decadent icing isn’t just about getting it done; it’s about enjoying the process. these rolls are the perfect blend of luxurious dessert options and comfort food recipes .
They’re what i imagine heaven smells like!
In the next section, i'll cover some additional information on icing variations and storage tips. this whole adventure in baking can step up to gourmet levels when you start experimenting with flavors.
So stay tuned!

Pro Tips & Secrets
Oh my gosh, can we just talk about how to make these heavenly chocolate rolls with luscious icing even more amazing? honestly, there are a few pro tips that i’ve picked up over the years that make these rolls a total game-changer.
First, always use warm milk (think baby bath warm, not scalding) to activate the yeast. it’s like giving your dough a comfy little blanket to cozy up in.
Next, knead your dough until it's smooth and elastic, about 5 to 7 minutes. you want fluffy rolls, not a dense brick! and if you’re short on time, you can prep the dough the night before .
Just pop it in the fridge after kneading and let it rise overnight. it’ll be ready to roll in the morning!
For extra flavor enhancement , you can mix a dash of vanilla extract right into the dough or sprinkle in some chocolate chips during the filling mix.
Who wouldn’t want a little explosion of chocolate goodness?
Perfect Presentation
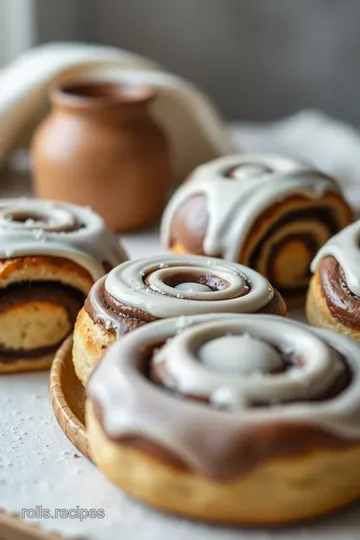
Okay, let’s get real—a beautifully presented plate of chocolate rolls is instagram gold! when it comes to plating these bad boys, keep it simple .
Place your rolls on a clean white plate to let those chocolatey shades pop. drizzle the decadent icing over the rolls in a zig-zag pattern.
Get all artsy with it!
Garnish ideas? try some fresh mint leaves or edible flowers for that fancy touch. color combinations make a difference too; a berry compote next to your rolls makes for a feast for the eyes and taste buds.
Storage & Make-Ahead
In case you’re wondering how to keep these bad boys fresh, here’s the scoop. store your chocolate rolls in an airtight container—believe me, you’ll want to keep them cozy.
They’ll last about 3 days at room temperature or a full week in the fridge. yup, you can enjoy them all week long!
Want to save time? you can absolutely make these rolls ahead of time ! just bake 'em, let 'em cool, and throw them in the fridge in a zip-top bag.
When you’re ready to indulge, just pop them in the oven at 350° f for about 10- 15 minutes to warm them back up.
Perfect for those cozy weekends!
Creative Variations
Feeling adventurous in the kitchen? there’s a world of flavors to explore! for a twist, you might try chocolate cinnamon rolls by adding some cinnamon to the filling.
Or for a seasonal touch, how about adding crushed peppermints or some subtle ginger spice around the holidays? there are endless possibilities.
If you’re into dietary modifications, swap out regular milk for almond milk or even throw in some flavored roll fillings like peanut butter or Nutella because who doesn’t love a little extra chocolate action?
Complete Nutrition Guide
Let’s chat about nutrition for a hot second. these scrumptious rolls aren't just about indulgence; they also give you the warm fuzzies of comfort food.
Each serving has around 290 calories , which isn’t too shabby for a sweet treat! you’re getting your carbs to help with that energy boost, plus some protein and fat.
But hey, listen. moderation is key, so enjoy these soft chocolate rolls in reasonable portions as part of a balanced diet.
Pair them with fruit to kick up those vitamins, and you’ve just leveled up your dessert game!
Expert FAQ Solutions
I always get questions about baking chocolate treats like these. one common one? “why didn’t my rolls rise?” well, make sure your yeast is fresh and that the milk was truly warm—not hot.
Yeast loves warmth! and if your rolls are too tough, you might’ve over-kneaded the dough. it’s all about finding the right balance.
Also, if you get a little creative with your fillings or even the icing, don’t be afraid! Think about how delicious a hazelnut spread glaze would be…yum, am I right?
In Conclusion
So, there you have it, my friends! these bake chocolate rolls with decadent icing are a delightful blend of comfort food and foodie dreams.
No matter if you’re whipping them up for brunch or just treating yourself, they’re sure to bring a smile to your face.
You can totally do this, and trust me, once you’ve mastered the chocolate roll recipe, there’s no stopping you! happy baking chocolate treats , and may your kitchen be filled with the delightful aroma of warm, delicious rolls.
Enjoy every bite!
Heavenly Chocolate Rolls with Luscious Icing Card
⚖️ Ingredients:
- 4 cups (480g) all-purpose flour
- 1/4 cup (50g) granulated sugar
- 2 teaspoons instant yeast
- 1 teaspoon salt
- 1 cup (240ml) whole milk, warmed
- 1/4 cup (60g) unsalted butter, melted
- 2 large eggs
- 1/2 cup (100g) brown sugar, packed
- 1/3 cup (30g) unsweetened cocoa powder
- 1/2 cup (115g) semi-sweet chocolate chips
- 1 teaspoon ground cinnamon (optional)
- 1 cup (125g) powdered sugar
- 2 tablespoons unsweetened cocoa powder
- 2-3 tablespoons milk (adjust for consistency)
- 1 teaspoon vanilla extract
🥄 Instructions:
- Step 1: In a large mixing bowl, combine flour, sugar, yeast, and salt.
- Step 2: In a separate bowl, whisk together the warmed milk, melted butter, and eggs.
- Step 3: Pour the wet mixture into the dry ingredients and mix until a dough forms.
- Step 4: Knead the dough on a lightly floured surface for 5-7 minutes until smooth.
- Step 5: Place in a greased bowl, cover with a towel, and let rise until doubled (about 1 hour).
- Step 6: In a small bowl, mix brown sugar, cocoa powder, cinnamon (if using), and chocolate chips.
- Step 7: After the dough has risen, punch it down and turn it onto a lightly floured surface.
- Step 8: Roll the dough into a rectangle (about 12x18 inches).
- Step 9: Spread the filling evenly over the dough, leaving a small border.
- Step 10: Starting from the long side, roll the dough tightly into a log.
- Step 11: Cut into 12 equal pieces and place on a lined baking sheet.
- Step 12: Preheat oven to 350°F (175°C).
- Step 13: Cover the rolls with a towel and let rise for an additional 30 minutes.
- Step 14: Bake for 25 minutes until golden brown. Let cool slightly.
- Step 15: In a mixing bowl, whisk together powdered sugar, cocoa powder, milk, and vanilla until smooth.
- Step 16: Drizzle or spread the icing over the warm rolls.
Previous Recipe: My Grandmother's Warm Apple Cinnamon Rolls with Cream Cheese Icing
Next Recipe: How to Bake Cinnamon Roll Cookies - Cozy Treats: 5 Amazing Secrets!