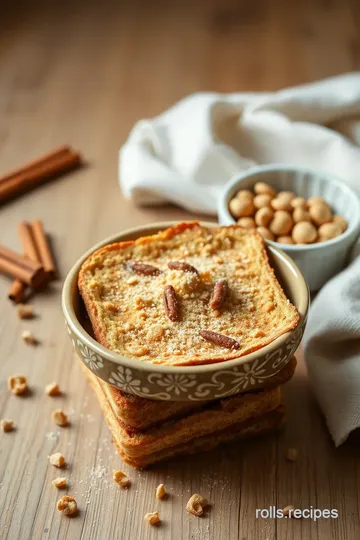
Healthy Cinnamon Toast Crunch Bites
Looking for a tasty, guilt-free treat? Try my Healthy Cinnamon Toast Crunch Bites! They're perfect for snacking or breakfast on the go.

- Let’s Talk About Guilt-Free Crunch: My Journey with Bake Cinnamon Toast Crunch Healthy Snack
- A Little History on These Bites of Joy
- The Good Stuff: Key Benefits of These Crunchy Delights
- Begin Your Baking Adventure!
- Essential Ingredients Guide to Kick Off Your Culinary Adventure
- Cooking Like a Pro: Mastering Professional Techniques
- Unleash the Crunch: Pro Tips & Secrets for Healthy Cinnamon Toast Crunch Bites
- Make-Ahead and Storage: Keep ‘Em Fresh!
- Creative Variations to Spice It Up
- The Lowdown on Nutrition
- Expert FAQ Solutions
- Wrap It Up: Now Go Bake!
- Recipe Card
Let’s Talk About Guilt-Free Crunch: My Journey with Bake Cinnamon Toast Crunch Healthy Snack
You ever find yourself reminiscing about those early morning breakfasts that rivaled a sugar rush at a carnival? i sure do.
One of my favorites was cinnamon toast crunch . you know the joy of that first bite—the crunch, the sweet cinnamon flavor, like a warm hug from a bowl? but as we grow, we realize our bodies can’t take sugar like a kid on halloween.
So, what's a crunchy cereal lover to do? enter the world of bake cinnamon toast crunch healthy snack ! you can indulge in a nostalgic treat without the guilt, and trust me, that’s something worth celebrating!
A Little History on These Bites of Joy
Originally, cinnamon toast crunch blasted onto the scene back in 1984, instantly becoming a breakfast staple. but as health trends evolved, so did our cravings.
Nowadays, folks are all about healthy snacks that don’t leave a sugar crash in their wake. and that’s why the healthy version of these bites became popular.
Not only do they taste good, but they fit right in with the clean-eating movement, making them perfect for weekends filled with baking and snacking.
How hard is it to whip these up? honestly, super easy —we’re talking a total of 35 minutes from prep to plate.
No culinary degree needed here! you can make about 12 bites , and they won’t break the bank, either. just a handful of pantry staples means you’ll have delightful guilt-free treats ready in no time.
The Good Stuff: Key Benefits of These Crunchy Delights
First off, let’s chat about the health benefits . these bites harness the power of oats and almond flour, which are excellent sources of fiber—hello, fiber-rich snacks! they help keep your belly happy and satisfied.
Plus, you can sweeten them up with real maple syrup instead of refined sugar—because who wants that junk anyway?
Now, about those special occasions—these bites are more than just a snack. they’re perfect for brunches, playdates, or even a chilly evening by the fire.
Picture this: you've got friends over, and you serve up these bites alongside a nice cup of tea. instant party starter, folks!
And let’s not forget how versatile they are! you can switch things up easily. want nut-free? just swap out the almond flour for oat flour.
Craving a chocolate fix? toss in some dark chocolate chips. the possibilities are endless, which makes them such a deliciously unique option compared to similar recipes.
Begin Your Baking Adventure!
So, are you ready to dive into this easy, thrilling world of homemade cinnamon toast crunch bites ? good! let’s get right into it.
You’re going to need some simple ingredients, and i promise the steps are a piece of cake—er, i mean bites !
These yummy treats are the perfect healthy snacks for anyone. whether you need a quick breakfast on-the-go or just want a crunchy snack, you'll love how easy these are to make.
Give them a try, and i promise you won't go back to those sugary cereals again.
With that, let’s take a peek at what you’ll need to whip up your Bake Cinnamon Toast Crunch Healthy Snack !
Ingredients to Gather:
- 1 cup rolled oats
- ½ cup almond flour
- 2 tablespoons coconut oil, melted
- 1/3 cup maple syrup or honey
- 1 tablespoon ground cinnamon
- ½ teaspoon vanilla extract
- ¼ teaspoon salt
- 1/3 cup chopped walnuts or pecans (if you’re feeling nutty!)
Just think about how delicious it'll be to dig into these bites. Seriously, your future self is going to thank you for this! Now, let’s get those ovens preheating and start mixing!
Essential Ingredients Guide to Kick Off Your Culinary Adventure
When you're stepping into the kitchen—whether it's to whip up a quick weeknight dinner or bake a delicious treat—having an essential ingredients guide is like having dinner-party cheat notes! let’s dive right in and break it down so you can become a star in your own kitchen.
Premium Core Components
First up, let’s talk about those premium core ingredients you absolutely need. I mean, can you really call yourself a cook without them? Here’s a handy checklist to work with:
- Measurements: Stick with 1 cup (240ml) for liquids and 1 teaspoon (5ml) for dry ingredients. If you’re feeling adventurous, go metric—1 cup equals 250ml!
- Quality Indicators: Look for vibrant colors in fresh fruits and veggies, and opt for whole grains over processed grains. Trust your senses—if it smells good, it’s probably good to go!
- Storage Guidelines: Most spices can last for years, while oils tend to go rancid within six months if exposed to light. Store them in cool, dark places for maximum shelf life.
- Freshness Tips: Always give a sniff! If it smells off, it probably is. When buying herbs, look for bright green leaves that aren’t wilting.
Signature Seasoning Blend
Next, you gotta have a signature spice blend . This is where things get personal—everyone has their favorites!
- Essential Spice Combinations: A pinch of cumin, a spoon of smoked paprika, and of course, let’s not forget the king of spices— ground cinnamon !
- Herb Selections and Pairings: Mix basil with tomatoes or rosemary with potatoes for killer flavor. And seriously, how could anyone resist the fresh scent of thyme?
- Flavor Enhancers: Good ol' garlic and onion can transform any dish. Toss in some citrus juice for that zesty kick.
- Regional Variations: Think of Italian Italian seasoning, or maybe a dash of harissa if you're feeling North African vibes!
Smart Substitutions
Ok, but let’s chat about smart substitutions because life happens, right? Here’s what you can do when you’re missing that one crucial ingredient.
- Common Alternatives: No almond flour? No worries! Use all-purpose flour instead.
- Dietary Modifications: Going gluten-free? Swap in oat flour or chickpea flour. Trust me, your taste buds won’t even notice!
- Emergency Replacements: No eggs? A mashed banana or some applesauce can do the trick in baking!
- Seasonal Options: When summer rolls in, ditch those frozen veggies for fresh, in-season produce.
Kitchen Equipment Essentials
Now, let’s talk kitchen tools —the unsung heroes of batting in the kitchen.
- Must-have Tools: You’ll need measuring cups, mixing bowls, and a good set of knives. Don’t forget your trusty spatula!
- Alternative Equipment: No whisk? A fork works just as well for those eggs!
- Preparation Tips: Set your ingredients out ahead of time. It’s like having a cheer squad for your cooking!
- Storage Solutions: Use glass containers to keep things fresh. Plus, they look darn pretty!
So, what does this all lead to? well, if you’re looking to indulge in a guilt-free treat , you can bake up some healthy cinnamon toast crunch bites! imagine sinking your teeth into those crunchy little snack bites, loaded with wholesome ingredients and flavored with that delightful cinnamon goodness.
Honestly, it's a perfect option for healthy snacks or an on-the-go breakfast!
Ready to dive into some simple baking recipes? Let’s get started!
Cooking Like a Pro: Mastering Professional Techniques
So, you wanna get into professional cooking, huh? it sounds fancy, but it’s more about a few essential steps and smart techniques than any secret sauce.
Whether you're trying to whip up a stellar dish or just make bake cinnamon toast crunch healthy snack , you’ve got to know the ropes!
Essential Preparation Steps
First off, let’s break down what you need to do before you start cooking. this is called mise en place .
It's just a french term for "everything in its place," but honestly? it’s a lifesaver. grab all your ingredients, chop veggies, and measure out your spices before you start.
It feels good to have everything ready, plus you won’t look like a headless chicken halfway through your dish.
Time management is key too. have a feel for how long things take. for example, if you're making those healthy cinnamon bites, you should aim for about 35 minutes total —that’s 15 minutes prep and 20 minutes cook time.
Plan your tasks so you're not scrambling at the last minute.
Next is organization . Keep your workspace tidy. A clutter-free zone makes you feel lighter and more focused. Trust me, you don’t want flour explosions everywhere!
Lastly, let’s not forget about safety . Always wash your hands and keep raw foods separate from cooked ones. It’s a bummer, but food safety is no joke.
Step-by-Step Process
Now that we’ve got our ducks in a row, let’s dive into the step-by-step process .
- First, preheat your oven to 350° F ( 175° C) . This way, it's good and ready when your snacks are.
- Line a baking sheet with parchment paper—easy cleanup is the name of the game, right?
- In one bowl, mix your dry ingredients : oats, almond flour, cinnamon, and salt. In another, whisk together your wet ingredients like melted coconut oil and maple syrup.
- Combine the two mixtures like they’re meant to be together—your cinnamon crunch bites will thank you!
- Shape them into small, bite-sized pieces. Smaller bites are better for snacking; they're like little energy explosions!
- Bake them for 15- 20 minutes until they’re golden brown. You'll know they’re ready when your kitchen smells like a warm bakery!
- Let ‘em cool down, sprinkle with some cinnamon sugar, and there you go!
Expert Techniques
When you’re on the pro level, you pick up some cool tricks. want to know a secret? the critical step is to taste as you go.
That’s how you figure out what your flavors need. if things are too dry, splash in a bit more syrup.
Too sweet? a dash of salt might do the trick!
You’ll want to keep an eye on the quality checkpoints too. make sure your oats are fresh and your spices are potent.
There's nothing worse than realizing you’ve been baking with stale cinnamon—no thank you!
And if a recipe goes sideways, don’t panic! here’s my favorite troubleshooting tip : always keep some nuts or dark chocolate on hand.
They can add a depth of flavor that can mask a mishap.
Success Strategies
Now, let’s chat about success. we’ve all made mistakes in the kitchen, right? classic ones like overmixing or not preheating.
Avoid these by double-checking your oven settings and following the timing precision of the recipe. seriously, a timer is your best friend!
For some quality assurance , if your bites are coming out too crumbly, try adding a touch more nut butter or coconut oil next time.
And remember, if you can't finish them right away, they’re perfect for meal prep snacks . store 'em in an airtight container, and they’ll stay fresh!
Finally, if you're a two-step planner like me, think ahead! you can make these cinnamon oatmeal bites ahead of time for busy mornings.
Toss one in your bag, and you’ve got a quick breakfast or snack on the go.
And there you have it! Mastering these cooking techniques will elevate your meals and help you whip up delicious, guilt-free treats in no time.
Additional Information
Feeling inspired? you now have the tools to make not just bake cinnamon toast crunch healthy snack but a multitude of other tasty and nutritious breakfast alternatives .
Keep practicing, experiment with flavors, and soon, you’ll be cooking up a storm like a pro! remember, the kitchen is your playground, and the more you play, the better you get.
Happy cooking!
Unleash the Crunch: Pro Tips & Secrets for Healthy Cinnamon Toast Crunch Bites
Alright, so you’re ready to dive into these bake cinnamon toast crunch healthy snack bites, but hold up! let’s chat about some pro tips and secrets to take these little nuggets of joy to a whole new level.
First off, timing is everything ! the easiest way to save time is to prep your ingredients while your oven preheats.
If you’ve got everything ready to roll, it’s a quick thing to mix together and pop in. you won’t have to stress about making a mess or feeling rushed.
Also, make sure you keep an eye on them as they bake. they can go from perfectly golden to oops , i burnt ‘em real fast—trust me!
When it comes to flavor enhancement, i always say, go big or go home. fresh spices make a massive difference.
A pinch of nutmeg in addition to your cinnamon? oh my gosh, it adds such warmth! and, if you wanna kick it up a notch, drizzle a little extra maple syrup on top before serving for that sweet finish.
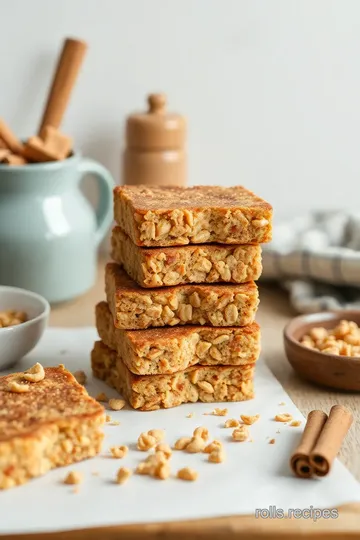
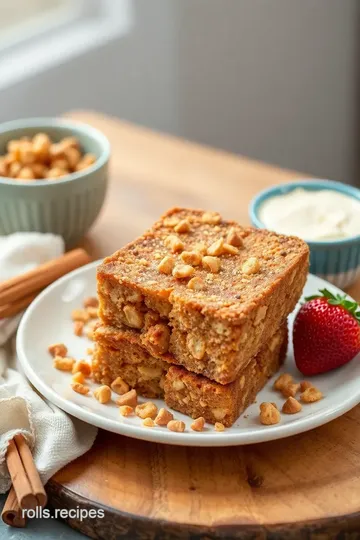
Now, let’s talk presentation . seriously, plating matters! use a fun bowl or a bright plate to serve these bites. you can sprinkle some cinnamon sugar on top or even dust with powdered sugar for a little flair.
A colorful fruit garnish makes everything pop—think slices of strawberries or citrus, just to brighten things up. you eat with your eyes first, right?
Make-Ahead and Storage: Keep ‘Em Fresh!
Now we all love a good healthy snack , but let’s keep it on point and easy! you can actually store these bites in an airtight container in the fridge for about a week.
Just be sure they cool completely first—that way, they won't turn into a soggy mess.
If you’re doing some meal prep snacks, toss some in a ziploc bag for on-the-go munching throughout the week. they’re perfect for a quick breakfast or a guilt-free treat during movie nights.
Want to reheat? just pop 'em in the microwave for a few seconds, and you're set!
Creative Variations to Spice It Up
Here's where the fun really begins— get creative! think chocolate chip bites if you’re feeling extra naughty or even a fruity twist by adding dried cranberries or coconut flakes.
Going dairy-free? swap out the coconut oil for avocado oil; your taste buds won’t hate it!
You can also turn them into fiber-rich snacks by tossing in some chia seeds or flaxseeds. It’s all about making this treat work for your vibe, you know?
Feeling seasonal? Throw in some pumpkin spice in the fall or a touch of peppermint extract around the winter holidays. The variations are endless!
The Lowdown on Nutrition
Let’s get real for a sec—these snacks pack a punch when it comes to nutrition. with rolled oats and almond flour, you're getting whole food recipes loaded with fiber and healthy fats.
One serving has around 120 calories , and they're surprisingly filling thanks to the protein and fat content. so, you can munch guilt-free while feeling full and satisfied.
Plus, a little crunch never hurt anybody!
Expert FAQ Solutions
Got questions? i’ve got your back! if your bites are falling apart, a little extra binding agent like a flax egg (couple tablespoons of flaxseed mixed with water) can save the day.
If you forget to set the timer, don’t panic—just peek in there; a visual check can often save your snack.
Remember, cooking is all about experimenting and having fun. So, don’t stress if you tweak a thing or two—the only thing that matters is that you love what you made!
Wrap It Up: Now Go Bake!
So there you have it, my friends! these healthy cinnamon toast crunch bites are not just a snack; they’re a little moment of joy.
Perfect for the kiddos, a quick breakfast snack, or a treat for your besties during a movie marathon.
Don't hesitate to make them your own and share the love! Honestly, the world needs more guilt-free treats, and here’s your chance to shine! So, grab your apron and go whip up these delicious snack bites! You’ve got this!
Healthy Cinnamon Toast Crunch Bites Card

⚖️ Ingredients:
- 1 cup (90g) rolled oats
- ½ cup (60g) almond flour
- 2 tablespoons (30g) coconut oil, melted
- 1/3 cup (80ml) maple syrup or honey
- 1 tablespoon (10g) ground cinnamon
- ½ teaspoon (2g) vanilla extract
- ¼ teaspoon (1g) salt
- 1/3 cup (50g) chopped walnuts or pecans (optional)
- 1 tablespoon (8g) cinnamon sugar for topping
🥄 Instructions:
- Step 1: Preheat the oven to 350°F (175°C).
- Step 2: Line a baking sheet with parchment paper or a silicone mat.
- Step 3: In a mixing bowl, combine rolled oats, almond flour, cinnamon, and salt. Whisk together.
- Step 4: In a separate bowl, whisk together melted coconut oil, maple syrup (or honey), and vanilla extract.
- Step 5: Pour the wet ingredients into the dry ingredients. Mix until fully combined. Add nuts, if using.
- Step 6: Using your hands, shape the mixture into small bite-sized balls or flat discs (about 1 to 1½ inches wide).
- Step 7: Place the bites on the prepared baking sheet, spacing them evenly. Bake for about 15-20 minutes, until golden brown.
- Step 8: Let cool for a few minutes, then sprinkle with the cinnamon sugar topping.
- Step 9: Enjoy warm or let cool completely before storing in an airtight container.
Previous Recipe: How to Make Texas Roadhouse Butter at Home: 5 Delicious Secrets
Next Recipe: Ultimate Savory Bake Roast Beef Sliders with Au Jus: A Tender Delight!