Bake Nut Rolls with Joyful Crunchy Nuts
Looking for the best Bake Nut Rolls with Joyful Crunchy Nuts? Enjoy a simple, comforting recipe filled with toasted nuts and sweet cinnamon. Perfect for brunch!

- A Sweet Kickstart to Your Day with Nut Rolls
- The Story Behind Nut Rolls
- Why You’ll Love These Nut Rolls
- Serving It Up
- Essential Ingredients Guide
- Professional Cooking Method: Bake Nut Rolls with Joyful Crunchy Nuts
- Bake Nut Rolls with Joyful Crunchy Nuts: A Nutty Journey
- Frequently Asked Questions
- Recipe Card
A Sweet Kickstart to Your Day with Nut Rolls
Oh my gosh! have you ever sunk your teeth into a freshly baked pastry and thought, “this is how i want to greet the day?” now, imagine that pastry is a nut roll filled with joyful, crunchy nuts .
A few months back, i woke up craving something comforting but special. i rummaged through my pantry and decided to whip up some homemade nut rolls.
What a delight! the sweet cinnamon filling mingling with toasted nuts had me floating on cloud nine, and trust me, it's the perfect way to start your morning or to impress at brunch.
So, let’s dive deep into this nut roll recipe that’s all about blending comfort with a touch of gourmet flair— all while being super easy to make!
The Story Behind Nut Rolls
First off, these crunchy nut-filled pastries aren’t just a modern trend. they trace their roots back to various european traditions, especially in eastern europe, where they symbolize hospitality and warmth.
Fast forward to today, and these rolls are making quite a name for themselves at brunch tables across america, bringing nostalgia with a sprinkle of innovation.
Now, let’s talk practicalities. from start to finish, you’ll need about an hour , but it’s worth every minute spent in the kitchen, especially when your home starts smelling like a bakery.
The difficulty level? i’d say it’s medium . if you’ve dabbled in dough making before, you’ll feel right at home.
As for costs, you’re looking at around $10 or less for the ingredients to yield about a dozen rolls. That’s a bang for your buck for these irresistible sweet cinnamon rolls !
Why You’ll Love These Nut Rolls
Now, let me hit you with some benefits. nut rolls aren’t just delicious; they pack a punch in the nutrition department too.
Nuts are filled with good fats, protein, and vitamins—talk about a health boost! you can even modify the filling based on what you have on hand, making it versatile for any palate.
Plus, they hit all the sweet spots—literally—when it comes to occasions! whether it’s a cozy weekend brunch with friends, a festive gathering, or just a tuesday morning that needs a little brightening up, these homemade nut rolls deliver.
And let’s chat about the magic that happens when you bite into one of these rolls. they are soft and crunchy at the same time! this combo stands out against other pastries you might come across.
Seriously, once you taste that flaky pastry dough with the toasted crunch of nuts, you’ll be hooked.
Serving It Up
What’s better than indulging in a nut roll fresh out of the oven? pair it with a drizzle of maple syrup glaze or a dollop of whipped cream topping for a decadent experience.
You could even slice them in half and spread on some butter for a classic finish. looking for something a tad more creative? throw in some chocolate chips to the filling for a sweet twist! the possibilities are endless with these rolls, really.
And if you’re like me and sometimes wish for a little morning decadence without the fuss, these rolls can be made ahead.
Just prep them the night before and pop them in the oven when you wake up. trust me, your friends will instantly think you’re a gourmet brunch genius.
So, are you ready to roll with me? Let’s gather those ingredients and unleash the magic of these flaky nut pastries in your kitchen!
Essential Ingredients Guide
Getting started with baking is all about the essentials . knowing your ingredients inside out can make all the difference. so let’s dive into these premium core components that’ll set you on the right path.
Premium Core Components
Understanding how to choose quality ingredients is key. for instance, when picking out nuts for our nut roll recipe , look for nuts that are crisp and have a natural sheen.
Always check the packaging, too. if it’s faded or ripped, it could mean the nuts are stale. storage is crucial ! keep them in an airtight container in a cool, dark place.
A good rule of thumb is to use them within six months for peak freshness.
When it comes to the dough , measurements matter. you’ll need 4 cups (500g) of all-purpose flour and 1/4 cup (50g) of granulated sugar.
Invest in a kitchen scale if you can! it helps with accuracy when following recipes.
Signature Seasoning Blend
Now, let’s talk about your go-to signature seasoning blend . it's about creating that perfect flavor profile . a classic combo for any nut roll is cinnamon and nuts —a timeless duo that gives pastries that warm hug feeling.
Try adding vanilla extract for a sweet twist. and hey! feel free to experiment with other spices: nutmeg or even a hint of cardamom can elevate your rolls.
Smart Substitutions
We’ve all been there—starting a recipe only to realize you're missing something. don’t sweat it! here are some smart substitutions for your homemade nut rolls : if you’re out of honey, maple syrup steps in like a champ.
No milk? any dairy-free alternative works. for a vegan twist , use flax eggs instead of the real deal.
Kitchen Equipment Essentials
Alright, let’s not skip over the kitchen equipment essentials . you’ll definitely need some must-have tools like a mixing bowl and a whisk for that lovely batter.
A rolling pin is your best friend here; it’s crucial for shaping dough. and don’t overlook parchment paper—it keeps your rolls from sticking like that friend who keeps tagging along!
If you want to make it easier, a silicone mat can be a great alternative to basic parchment. preparation tip: lay out your tools and ingredients first, so there’s no mad scramble once you get started.
Whipping Up Those Nut Rolls
Now that we’ve covered the essentials, let’s circle back to our amazing bake nut rolls with joyful crunchy nuts . these rolls are perfect for cozy brunches or just snacking while you binge-watch your favorite show.
Seriously, you’ll feel like a pro once you nail that dough-making technique.
Fun fact: Did you know that cinnamon rolls were originally a German treat? Well, we’re Americanizing them with a nutty twist! It’s comfort food at its finest—perfectly soft yet delightfully crunchy.
Final Thoughts
Before heading into the deep end of the instructions , remember: baking is meant to be fun, and every batch is a chance to learn and improve your skills.
Whether you're crafting breakfast pastries for sunday brunch or seeking out creative pastry fillings that wow your friends and family, just have fun with it! so grab your apron, channel your inner baker, and get ready to enjoy every moment in the kitchen.
Now, let’s dive into the instructions for those drool-worthy, crunchy nut-filled pastries. Time to whip up some magic!
Professional Cooking Method: Bake Nut Rolls with Joyful Crunchy Nuts
Oh my gosh, if you're looking for a cozy treat to impress your friends or just satisfy that sweet tooth, you’ve gotta try bake nut rolls with joyful crunchy nuts .
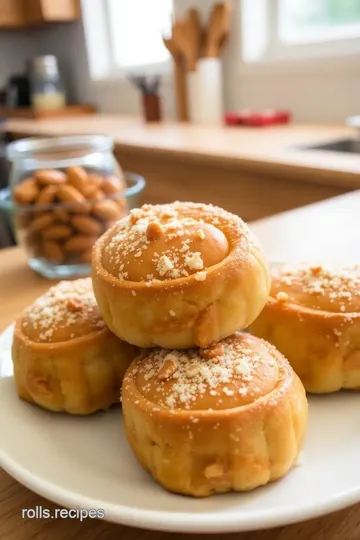
Picture this: a warm, flaky pastry filled with a crunchy nut mixture, sweet cinnamon dreams, and a hint of honey.
It’s like wrapping yourself in comfort food recipes while you sip your morning coffee. so, let’s dive into the nitty-gritty of this professional cooking method, shall we?
Essential Preparation Steps
Mise en Place: Get Your Act Together
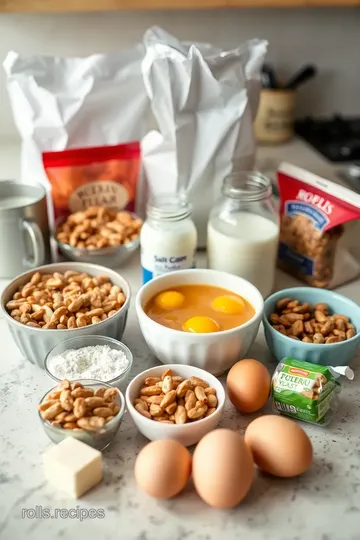
Before jumping into the kitchen jungle, gather all your ingredients. seriously, nothing derails the flow like hunting for sugar when you’re knee-deep in dough.
Make sure you’ve got your 4 cups of all-purpose flour , 1 cup of warm milk , and all those crunchy nuts ready to go!
Time Management Tips
Cooking is like a dance; timing is everything. Aim for 30 minutes for prep and 20- 25 minutes for baking. Trust me, it makes the process smoother.
Stay Organized
Create a little assembly line. Separate bowls for dough, filling, and toppings will keep you from chaos. This little trick will save you from that “what was I doing again?” moment!
Safety First
Keep a clean workspace! Sanitize those surfaces, and make sure you know where that jar of honey is — we don't want sticky mishaps.
Step-by-Step Process
-
Prepare Your Dough: Mix your warm milk with the active dry yeast and let it froth for 5 minutes . It’s like magic, trust me.
-
Combine ingredients: whisk flour , sugar , and salt in a bowl. make a well and pour in your yeast mix, melted butter , and eggs.
Stir until it comes together into a dough.
-
Knead, Knead, Knead: Turn that dough onto a floured surface and knead for about 5- 7 minutes until smooth. Think of it like giving your dough a little love.
-
Let it rise: place in a greased bowl, cover it up, and let it rise for 1 hour . it’s important to find a warm spot here, or else your dough will just sulk.
-
Make That Filling: While you’re waiting, mix up those 2 cups of mixed nuts , brown sugar, cinnamon, and honey. This is where it all comes together — sweet, nutty goodness.
-
Roll, fill, and shape: preheat your oven to 350° f ( 175° c) . roll out the dough, spread the filling, and then roll it into a log.
Slice those into 12 pieces . this part always reminds me of cutting sandwiches as a kid — the perfect bite-sized treat.
-
Final rise: let those rolls rest for another 20- 30 minutes , then brush with egg wash. pop them in the oven for 20- 25 minutes until they’re golden brown and smell like heaven.
Expert Techniques
-
Temperature Control Points: Always keep an eye on your oven! It can be a savage beast. If it’s hotter or cooler than expected, your nut rolls may not rise properly.
-
Timing Precision: This is the critical part — don’t wander off! Set a timer for every step, especially for that dough rise.
-
Visual Cues for Doneness: You want those nut rolls to be golden brown. If they’re still pale, they need more time. And the yummy smell? That’s your cue!
Success Strategies
Avoid Common Mistakes
Don’t skip the resting time for the dough. I once tried rushing and ended up with tiny, dense rolls. Yikes!
Quality Assurance Tips
Use fresh ingredients. Old flour or nuts can throw off the flavor. You know you want those crunchy nut filled pastries to shine.
Perfect Results Guide
Check for that golden brown color and listen for a hollow sound when tapped on the bottom — it’s like a secret handshake that means they’re done.
Make-Ahead Options
Want these for brunch? Prep the filling the night before and store it in the fridge. Roll them out in the morning, and an adult-friendly brunch is just an hour away!
So there you have it! look into into this nutty adventure and bake nut rolls with joyful crunchy nuts — your friends will love them.
Think of all those sweet cinnamon rolls merging with the comforting flavors of nuts ! next up, i’ll share some additional information and tips to take your baking game even higher.
Stay tuned!
Bake Nut Rolls with Joyful Crunchy Nuts: A Nutty Journey
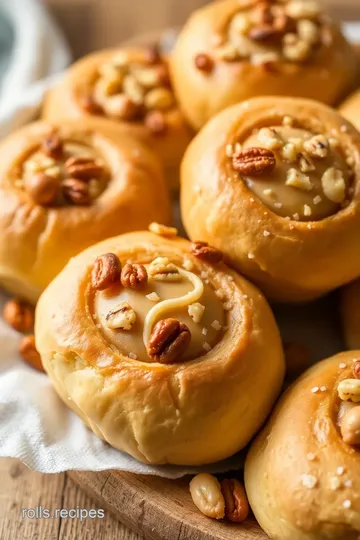
Everyone loves a little indulgence, right? i mean, who can resist soft and crunchy treats, especially when they’re drizzled with honey and packed with joyful crunchy nuts ? seriously, these nut rolls are not just any pastry – they’re a true labor of love that brings family and friends together over brunch.
So, let’s dive into some tips and secrets that’ll make your baking experience a breeze !
Pro Tips & Secrets
Chef’s personal insights
you know what i’ve learned? the secret to the best nut roll recipe starts with the dough.
Don’t rush it! letting it rest is what transforms it from “meh” to magnificent. i usually set a timer and walk away – it’s like magic!
Time-saving techniques
if you’re crunched for time, you can prep the filling and even the dough the night before.
Just let the dough rise in the fridge overnight. it’ll be ready to roll in the morning! this is a game-changer for those lazy sunday brunches.
Flavor enhancement tips
while the traditional cinnamon and nut combination is a must, think outside the box! add a splash of vanilla extract or a hint of nutmeg for a delicious twist.
Trust me, your guests will be raving about it!
Presentation advice
when your rolls come out of the oven golden brown, a drizzle of maple syrup glaze takes them to new heights.
And don’t forget to sprinkle some extra nuts on top. it adds a rustic charm that’s oh-so-inviting.
Perfect Presentation
Plating your rolls can be as fun as creating them. Arrange them on a beautiful platter and serve with a side of whipped cream or yogurt.
Garnish ideas
fresh berries or a dusting of powdered sugar can be your best friend here! they lend a pop of color that’ll make your baking with nuts look like gourmet brunch recipes worthy of any fancy cafe.
Color Combinations
You want your plate to look appealing, right? Think about contrasting colors – the rich golden pastry against the bright red of berries makes for a stunning visual treat.
Visual Appeal Tips
A little sprinkle of chopped mint can elevate your rolls even further! It’s like inviting summer into your kitchen.
Storage & Make-Ahead
We all know leftovers can linger a little too long in the fridge, but here’s how to make sure they stay fresh.
Storage guidelines
these rolls are best stored in an airtight container. they’ll last about 3-4 days at room temperature.
If you want them to stay cozy for longer, pop them in the freezer.
Preservation Methods
To freeze, wrap individual rolls in plastic wrap and then place them in a freezer-safe bag. Just remember to thaw them in the fridge overnight before reheating!
Reheating Instructions
I like to reheat my rolls in the oven at 350° F for about 10 minutes. You just get that warm, flaky pastry dough back to life.
Creative Variations
Now, I get it—sometimes you wanna shake things up, so let’s talk variations!
Flavor Adaptations
Switch it up with different nuts! How about hazelnuts with a chocolate twist ? Or mix them with dried fruits for a super sweet surprise!
Dietary Modifications
Got vegan friends? No problem! Substitute the butter with coconut oil and the honey with agave syrup. They won’t even notice the difference!
Seasonal Twists
In fall, throw in some pumpkin spice or even cranberries for a festive vibe. Seriously, these make the perfect comfort food recipes !
Complete Nutrition Guide
Detailed Breakdown
Each roll is approximately 250 calories , packed with healthy fats and a touch of sweetness. Those nuts are like little powerhouses of nutrition!
Health Benefits
With a few cups of mixed nuts in there, you’re getting fiber, protein, and heart-healthy fats. It’s a guilt-free indulgence!
Dietary Considerations
If you’re counting carbs or calories, enjoy these homemade nut rolls in moderation. They're great fuel for a busy day or a brunch pick-me-up!
In Conclusion
So there you have it! you’re now ready to bake nut rolls with joyful crunchy nuts that’ll have everyone singing your praises.
Whether it’s an adult-friendly brunch or a cozy breakfast idea, these flaky pastry delights are sure to impress. grab those ingredients and let’s get baking! remember, it’s about the process and the joy it brings – not just the final roll.
Happy baking, my friends!
Frequently Asked Questions
What nuts work best for making Bake Nut Rolls with Joyful Crunchy Nuts?
You can use a variety of nuts such as walnuts, pecans, and almonds for making Bake Nut Rolls with Joyful Crunchy Nuts. Each type contributes its own distinct flavor and crunch. Feel free to experiment by mixing different nuts to cater to your taste preferences!
Can I substitute any ingredients in the Bake Nut Rolls recipe?
Yes! If you don't have warm milk, you can use almond milk or any non-dairy alternative. For sweeteners, feel free to swap honey with maple syrup or agave syrup. Additionally, you can replace mixed nuts with dried fruits like raisins for a fruity variation.
How should I store leftover Bake Nut Rolls with Joyful Crunchy Nuts?
To keep your rolls fresh, store them in an airtight container at room temperature for up to 2 days. For longer storage, you can refrigerate them for up to a week or freeze them for up to 3 months. Just ensure they are well-wrapped to prevent freezer burn.
Can I make the dough in advance for the Bake Nut Rolls?
Absolutely! You can prepare the dough ahead of time and refrigerate it after the first rise. Just allow it to come to room temperature and rise before shaping the rolls. This can save you time on a busy day while still allowing you to enjoy delicious fresh rolls!
What are some tips for beginners making Bake Nut Rolls for the first time?
Begin by ensuring your yeast is activated properly by using warm milk that isn't too hot. Also, take your time during the dough kneading step; a well-kneaded dough will improve the texture. Follow each step carefully, and remember, practice makes perfect!
Can I add a glaze to my Bake Nut Rolls for extra sweetness?
Yes! A simple glaze made from powdered sugar and milk can add a lovely sweetness. Drizzle it on the rolls after they have cooled slightly for a delightful finish. Alternatively, you can sprinkle powdered sugar on top for a simple yet elegant touch!
Bake Nut Rolls with Joyful Crunchy Nuts Card

⚖️ Ingredients:
- 4 cups (500g) all-purpose flour
- 1/4 cup (50g) granulated sugar
- 1 packet (2 1/4 tsp or 7g) active dry yeast
- 1/2 tsp salt
- 1 cup (240ml) warm milk
- 1/2 cup (115g) unsalted butter, melted
- 2 large eggs
- 2 cups (240g) mixed nuts (walnuts, pecans, almonds), roughly chopped
- 1/4 cup (50g) brown sugar
- 1 tsp ground cinnamon
- 1/2 cup (120ml) honey or maple syrup
- 1/4 tsp salt
- 1 egg (for egg wash)
- Extra chopped nuts for garnishing (optional)
🥄 Instructions:
- Step 1: In a small bowl, combine warm milk and yeast. Let it sit until frothy (about 5 minutes).
- Step 2: In a large bowl, whisk flour, sugar, and salt together. Create a well in the center.
- Step 3: Add the yeast mixture, melted butter, and eggs into the well. Mix until a dough forms.
- Step 4: Turn the dough onto a floured surface and knead for about 5-7 minutes until smooth.
- Step 5: Place the dough in a greased bowl, cover with a kitchen towel, and let rise in a warm area for 1 hour or until doubled in size.
- Step 6: In a bowl, mix chopped nuts, brown sugar, cinnamon, honey, and salt until combined.
- Step 7: Preheat oven to 350°F (175°C). Line a baking sheet with parchment paper.
- Step 8: Once risen, punch down the dough and roll it out into a rectangle. Spread the nut filling evenly over the surface.
- Step 9: Roll the dough tightly into a log, slice into 12 equal pieces, and place them cut-side up on the baking sheet.
- Step 10: Cover the rolls with a towel and let rise for another 20-30 minutes.
- Step 11: Brush with egg wash and sprinkle with extra nuts (if desired).
- Step 12: Bake for 20-25 minutes or until golden brown.
Previous Recipe: Easy & Juicy Grilled Turkey Rolls with Creamy Cheese Delight: My Fail-Proof Herb Glazed Method
Next Recipe: Easy & Juicy Bake Cheesy Garlic Hawaiian Rolls in 35 Min: My Go-To Recipe