Savory Olive Rolls with Herbs and Cheese
Craving something delightful? Here's my go-to for Baking Olive Rolls with Savory Flavors. Perfect for snacking or as a side. You’ll love this!

- Recipe Overview
- Key Benefits
- Essential Ingredients Guide
- Stirring Up Some Savory Magic: The Professional Cooking Method
- Pro Tips & Secrets for Baking Olive Rolls with Savory Flavors
- Perfect Presentation
- Storage & Make-Ahead
- Creative Variations
- Complete Nutrition Guide
- Expert FAQ Solutions
- Recipe Card
Oh my gosh, have you ever taken a bite of something that instantly transported you to a sun-soaked afternoon in the mediterranean? that’s what my first taste of baking olive rolls with savory flavors did for me! picture this: i was at a cozy café in santorini, and the aroma of fresh bread mingled with the salty sea air.
That experience stuck with me, and now i’m here to share how you can recreate that magic right in your own kitchen.
If you’re looking for a unique spin on your bread game, this olive roll recipe is your golden ticket! with a blend of savory herbs, pitted olives, and gooey cheese, these rolls are perfect for snacking, dunking in soups, or even as a fancy appetizer at your next gathering.
They’re not just delicious; they pick up that beautiful essence of mediterranean bread recipes that truly makes every meal feel special.
Recipe Overview
Let’s take a little trip down memory lane. these rolls have their roots deeply embedded in mediterranean cuisine, where olive oil and fresh herbs are household staples.
In modern times, they’ve become a superstar—everyone loves a good savory bread roll to serve with dinner or just to munch on while watching tv.
Honestly, they’re like the swiss army knife of snacks!
Now, you might be thinking, “sounds great, but how tough is this?” here’s the scoop: it’s medium in difficulty. you'll need some dough-handling skills, but if you've ever tackled a yeast roll recipe , you’re halfway there.
The time commitment is totally manageable—about 20 minutes for prep, an hour for proofing, and about 25 minutes baking. in total, you’re looking at just under two hours.
Easy peasy!
And let’s not forget about cost. the ingredients for these homemade bread rolls are pretty wallet-friendly. with a few pantry staples and some olives, you can whip up about 12 of these bad boys.
Perfect for sharing—or for hoarding all to yourself!
Key Benefits
Now, why should you make these fluffy bread rolls ? let’s talk about the benefits. first off, they’re packed with flavor! the unique selling point here is that you can customize the filling—think about adding garlic, fresh herbs, or even a sprinkle of red pepper flakes for some heat.
They are perfect for special occasions, making them an excellent addition to your party food ideas for your next gathering!
Nutritionally, olives are known for being heart-healthy. they come with their own set of health benefits and are full of good fats.
Plus, they add that incredible umami flavor, which means every bite is a joyride for your taste buds. you might even say they’re a superstar among savory snacks !
Feeling fancy? serve these rolls alongside some soup or as part of an appetizer spread. they add a touch of warmth and comfort, perfect for rainy days or cozy nights in.
And trust me, they’ll get devoured within minutes. you just might want to consider doubling the recipe!
And with that, let’s jump into the ingredients you’ll need to get started with these delicious gems. You’ll want to be all set before you start baking, so let’s line up our culinary arsenal for some delightful olive appetizer ideas !
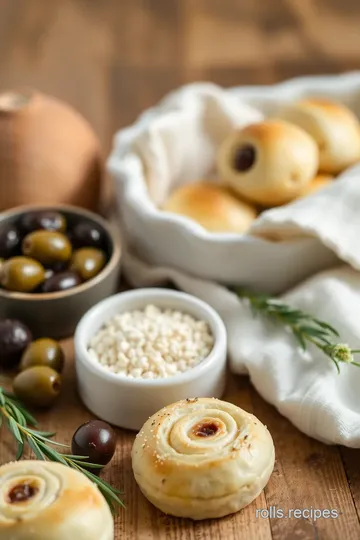
Essential Ingredients Guide
Alright, folks. let’s dive into the world of baking, where some things can make or break your rolls. if you’re gearing up to whip up those savory olive rolls with savory flavors , you’ll want to know your essentials.
So, grab a cup of coffee, and let’s chat about the ingredients, tools, and sneaky replacements that’ll make your baking experience a breeze!
Premium Core Components
When it comes to baking, quality really does matter. Kind of like how you wouldn’t grab just any old loaf if you’re celebrating a special occasion.
Measurements, Measurements, Measurements!
For our dough, you’re gonna need 3 ½ cups of all-purpose flour (that’s 440 grams for my metric friends), a packet of active dry yeast (2¼ teaspoons or 7 grams).
And please, when measuring wet ingredients, make sure that water is about 110° f ( 43° c) —not some bonfire hot, but warm enough to activate the yeast.
Quality Indicators
Always check the expiration date on your yeast. trust me, a dead yeast is a sad day when you’re trying to make your olive roll recipe come to life.
Look for flour that feels soft and is free from clumps. fresh herbs should be vibrant, not wilted, okay?
Storage Guidelines and Shelf Life
Keep your flour in a cool, dark place, and maybe seal it in a glass jar if you want it to stay fresh.
Generally, flour lasts about 6-12 months . yeast should also be stored in a cool, dry area, ideally sealed tightly. if you’ve got leftover olives, pop them in a jar and cover 'em with olive oil for a delicious, homemade snack!
Freshness Tips
When choosing pitted olives for your rolls, give them a little sniff test! They should smell briny but pleasant. If they smell off, just let them be. Trust your nose, people!
Signature Seasoning Blend
Now, let’s add some oomph with our seasonings! A simple mix can take your rolls from bland to grand.
Essential Spice Combinations
Salt is your best friend, but you’ll definitely want to throw in some dried oregano and parsley into that filling for a mediterranean vibe.
A bit of garlic doesn’t hurt either! trust me, the aroma when you bake these rolls is outta this world.
Herbs and Pairings
Go for fresh parsley if you can. It’s a game-changer! You might also consider mixing in some chopped sun-dried tomatoes if you feel adventurous.
Smart Substitutions
Let’s say the grocery gods are against you, and you’re out of something. Don’t sweat it—I’ve got your back!
Common Alternatives
If you find yourself missing olives, feel free to swap in roasted red peppers for a different kick. They’ll give you that Mediterranean flair in a pinch.
Dietary Modifications
For those avoiding gluten, you could experiment with a gluten-free flour blend, though the texture might differ a bit.
Emergency Replacements
No mozzarella? No problem! Use whatever cheese you’ve got in your fridge. Cheddar could do the trick, just keep in mind it will change the flavor.
Kitchen Equipment Essentials
Now, let's talk tools. You don’t need a million gadgets to bake these dreamy rolls, but there are a few must-haves.
Must-Have Tools
A large mixing bowl is a must, plus a rolling pin to help stretch out your dough. If you don’t have one, a wine bottle can work in a pinch, but let’s keep that to ourselves!
Preparation Tips
When you’re kneading that dough, make sure your hands are floured to avoid sticking. Knead for 8- 10 minutes, long enough for the dough to become smooth and elastic.
Storage Solutions
If you have leftover rolls (which is rare, to be honest), tuck them in an airtight container—you want to keep those fluffy bread rolls as fresh as possible.
Well, there you have it, my friend! we've gone through the nitty-gritty of ingredients, dependable tools, and even a few crafty substitutions for your dough adventure.
If you’re ready to bring it all together and make those savory olive rolls with savory flavors , let’s check out the step-by-step instructions next.
Grab your apron and let’s get rolling!
Stirring Up Some Savory Magic: The Professional Cooking Method
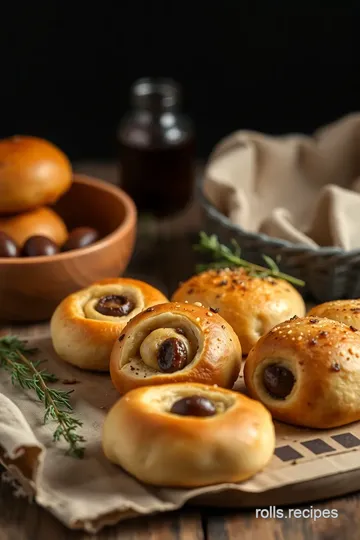
Hey there, friend! today, we're diving into a tasty adventure with my savory olive rolls with herbs and cheese recipe.
Think flaky, fluffy rolls bursting with mediterranean flavor that’ll knock your socks off. we'll cover some professional kitchen tricks that'll make you feel like a culinary wizard in your own home.
Essential Preparation Steps: The Backbone of Success
Before we even think about grabbing the mixing bowl, let’s chat about mise en place . it sounds fancy, but it just means getting your ingredients and tools ready before you start cooking.
For my olive roll recipe, have your 3 ½ cups of flour , 1 cup of warm water , and all the olives and cheese prepped.
Trust me; this saves time!
Now, let’s vibe with some time management tips . set a timer for the rising times: 1 hour for the first rise and 30 minutes for the second rise .
Use your phone or an old-school kitchen timer. just don’t trust your kitchen clock. it’s probably been wrong since you moved in!
Organization is key; it's like a game of tetris in the kitchen. keep your workspace tidy. the cleaner it is, the less chaos when things heat up.
Oh, and please, safety first! keep that kitchen tidy so no one trips over flour bags. we can’t have anyone colliding with the saucepans!
Step-by-Step Process: Your Recipe Roadmap
Alright, let’s jump into the kitchen action! Here’s how to create these rolls step-by-step:
-
Activate the yeast:
combine 1 cup of warm water and 2 tablespoons of sugar . sprinkle your 1 packet of active dry yeast over it and let it sit for 5- 10 minutes until it's all frothy. -
Prepare the dough:
in a large mixing bowl, combine 3 ½ cups flour and 1 teaspoon salt . make a well in the center and get ready to mix in that yeast mixture and 2 tablespoons olive oil . -
Knead the Dough:
Dust your surface and roll up those sleeves! Knead the dough for 8- 10 minutes until it’s smooth and elastic. -
First Rise:
Place the dough in a greased bowl, cover with a kitchen towel, and let it relax in a warm spot for about 1 hour . -
Prepare the filling:
chop up 1 cup of pitted olives , mix with 1 cup of shredded mozzarella , 2 tablespoons parsley , and so on.This is where the magic starts!
-
Shape the rolls:
once the dough is ready, roll it out into a rectangle ( 12x18 inches ), spread your filling, roll it tightly, and cut it into 12 equal pieces . -
Second Rise:
Place your rolls in a lined baking sheet, cut sides up, and let them rise for another 30 minutes . -
Bake:
Preheat that oven to 375° F ( 190° C) and bake those beauties for 20- 25 minutes until they’re golden brown. -
Cool & Serve:
Let the rolls cool a bit, but seriously, don’t wait too long. Serve warm!
Expert Techniques: Leveling Up Your Game
After whipping up these rolls, consider adding critical steps like brushing the tops with olive oil before baking. this gives them a yummy golden crust! and if you notice they aren’t rising? double-check your yeast.
It should be fresh; no one likes flat rolls!
Success Strategies: The Insider's Touch
So, what are the common mistakes to avoid? first, don’t let your water be too hot when activating the yeast.
It's a total game-ender! and always give that second rise a chance. that's where the fluffiness comes in—not to mention that tantalizing aroma of baking with yeast filling your home.
If you want to prep ahead, mix your filling and keep it ready to roll. even better, freeze the unbaked rolls.
When a snack craving hits or unexpectedly guests arrive, you’ll be the star of the show!
Wrapping It Up: Why These Rolls Rock
In the world of home baking, these savory olive rolls stand out as true crowd-pleasers—perfect for soups, parties, or just a cozy snack.
With the right methods and a sprinkle of love, you can master these unique roll recipes and impress everyone.
As we move on, look at how these rolls fit into the broader picture of easy-to-follow bread recipes , blending the flavors of the mediterranean with your personal touch.
Let's chat more about making these flavors come alive in our next section on additional information . happy baking, my friend!
Pro Tips & Secrets for Baking Olive Rolls with Savory Flavors
You know when you bake something, and the smell fills your whole house? that’s what we’re aiming for with these savory olive rolls .
Here are some insider tips straight from my kitchen to yours!
Chef’s Personal Insights
When i first tackled an olive roll recipe , i think i used half the olives that the recipe called for.
Crazy, right? don’t skimp on those pitted olives ! their briny flavor is what makes these rolls pop. trust me, a flavor explosion is what we want here!
Time-Saving Techniques
Let’s be real: we’re all busy. For a quick prep, mix your dry ingredients the night before. Just keep them covered, and when you’re ready to bake, you’re halfway there!
Flavor Enhancement Tips
A little sprinkle of some aromatic herbs while kneading goes a long way. Toss in some dried oregano or even some fresh basil if you have it on hand—instant lift in flavor!
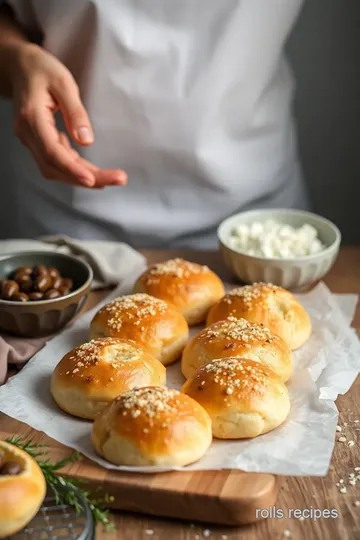
Presentation Advice
Don’t just throw these rolls on a plate! arrange them in a circle on a platter, like a little olive roll family.
Drizzle some olive oil on top and maybe sprinkle some herbs for that fashion statement —it’s all about visual appeal !
Perfect Presentation
Plating Techniques
Let’s talk presentation. First off, color is key! These rolls are golden brown, right? Find a colorful dish like turquoise or red to really let those savory bread rolls shine.
Garnish Ideas
Fresh herb sprigs look nice on the plate. Maybe a little rosemary? It screams “I know what I’m doing in the kitchen!”
Color Combinations
Bright green from the olives and fresh herbs against that golden bread? A feast for the eyes, folks.
Visual Appeal Tips
Serve with a simple dipping sauce, like a garlic aioli or a tangy yogurt dip. Your friends will think you’re on par with a top-notch restaurant.
Storage & Make-Ahead
Storage Guidelines
If you’ve got leftovers (not sure how, but hey!), let them cool completely. store in an airtight container. these rolls are best fresh, but they’re good for up to three days at room temp.
Preservation Methods
Freezing is your friend! Wrap them tightly in foil and toss them in a freezer-safe bag for up to a month.
Reheating Instructions
When it's time to enjoy again, just pop them in a preheated oven at 350° F ( 175° C) for about 10 minutes to warm them up and restore that fluffy goodness.
Freshness Duration
Honestly, these rolls are best served fresh. But if you find yourself with some, they still taste darn good after a day or two.
Creative Variations
Flavor Adaptations
Feeling adventurous? Swap out some of those savory snacks with sun-dried tomatoes or even spinach.
Dietary Modifications
Want a vegan option? Omit the cheese or use a dairy-free alternative. Boom—vegan olive appetizers that everyone can enjoy!
Seasonal Twists
Add some steamed pumpkin in the fall, or maybe some chopped jalapeños in the summer for a kick.
Regional Variations
Try incorporating flavors from different Mediterranean bread recipes . Maybe some feta or chimichurri? You really can’t go wrong.
Complete Nutrition Guide
Detailed Breakdown
These rolls pack a punch! One roll has about 200 calories and 6 grams of protein. Not too shabby for a roll that’s filled with deliciousness!
Health Benefits
Olives are a great source of healthy fats, and olive oil is loaded with antioxidants. Your body will thank you!
Dietary Considerations
Keep an eye on salt if that’s a concern for you. These rolls do have some sodium thanks to the olives and cheese.
Portion Guidance
I recommend one or two rolls as a snack. You’ll want to save room for more after your first!
Expert FAQ Solutions
Common Questions
“Can I use dried herbs instead of fresh?” Heck yeah! Just use less since dried herbs are more concentrated.
Troubleshooting Guide
If your dough isn’t rising, it just means your yeast didn’t activate! Check the temp of your water next time.
Success Tips
Don’t rush the dough fermentation process. Those fluffy bread rolls come from good dough development!
Variations Explained
Trying out different cheeses like a crumbly feta can bring a whole new level to your savory rolls.
As you embark on your journey to bake these savory olive rolls with herbs and cheese , remember: cooking is all about experimenting and finding what makes you happy.
Enjoy the process, share with friends, and don’t be afraid to get your hands messy. happy baking!
Savory Olive Rolls with Herbs and Cheese Card

⚖️ Ingredients:
- 3 ½ cups all-purpose flour (440g)
- 1 packet active dry yeast (2 ¼ teaspoons or 7g)
- 1 cup warm water (110°F or 43°C / 240ml)
- 2 tablespoons sugar (25g)
- 1 teaspoon salt (5g)
- 2 tablespoons olive oil (30ml)
- 1 cup pitted green and/or black olives, chopped (150g)
- 1 cup shredded mozzarella cheese (100g)
- 2 tablespoons fresh parsley, chopped (or 1 tablespoon dried) (10g)
- 1 clove garlic, minced
- 1 teaspoon dried oregano (5g)
🥄 Instructions:
- Step 1: In a bowl, combine warm water and sugar. Sprinkle yeast on top. Let sit for 5-10 minutes, until foamy.
- Step 2: In a large bowl, combine flour and salt. Create a well in the center and add activated yeast and olive oil. Mix until a dough forms.
- Step 3: Turn the dough out onto a floured surface. Knead for about 8-10 minutes until smooth and elastic.
- Step 4: Shape the dough into a ball and place in a greased bowl. Cover with a towel and let rise in a warm place until doubled in size (about 1 hour).
- Step 5: In a bowl, combine olives, mozzarella, parsley, garlic, and oregano. Mix well and set aside.
- Step 6: Punch down the risen dough. Roll out into a rectangle (about 12x18 inches). Spread the filling evenly over the dough. Roll tightly into a log starting from one long end. Cut into 12 equal pieces.
- Step 7: Place rolls on a lined baking sheet, with cut sides facing up. Cover and let rise for 30 minutes.
- Step 8: Preheat the oven to 375°F (190°C). Bake rolls for 20-25 minutes until golden brown and cooked through.
- Step 9: Allow rolls to cool slightly before serving. Enjoy warm!
Previous Recipe: Ultimate Roasting Pork Hotdogs with Sticky Onions: 5 Irresistible Tips!
Next Recipe: Best Zesty Stir-Fry Sausage & Noodles with Orange Sauce: 10 Easy Steps!