Bake Chocolate Rolls with Hazelnut Delight
Looking for a delicious treat? I've perfected my recipe to Bake Chocolate Rolls with Hazelnut Delight—warm, gooey, and ready to share! Let's bake!

- A Sweet Introduction to the Bake Chocolate Rolls with Hazelnut Delight
- The Joy of Rolling into History
- Why You Need These Rolls in Your Life
- Taking the First Step Towards Sweetness
- Essential Ingredients Guide
- The Art of Professional Cooking: Mastering Techniques for Sweet Success
- Unlocking the Secrets of Bake Chocolate Rolls with Hazelnut Delight
- Recipe Card
A Sweet Introduction to the Bake Chocolate Rolls with Hazelnut Delight
Okay, so picture this: it’s sunday morning, and the smell of something amazing wafts through your home. you know the kind of aroma that gets everyone out of bed before they even realize what’s cooking? that’s the magic of bake chocolate rolls with hazelnut delight .
I still chuckle at the first time i attempted this — flour everywhere, a tiny kitchen disaster. but hey, it was totally worth it! with each bite, you’re hit with that rich, chocolatey sweetness, instantly melting any lingering sleepiness away.
Have you ever found yourself staring at something delicious at a cafe and thinking, “i wish i could make that”? well, good news: you can! this recipe is rooted in delightful european pastry recipes but brings a little american twist to it.
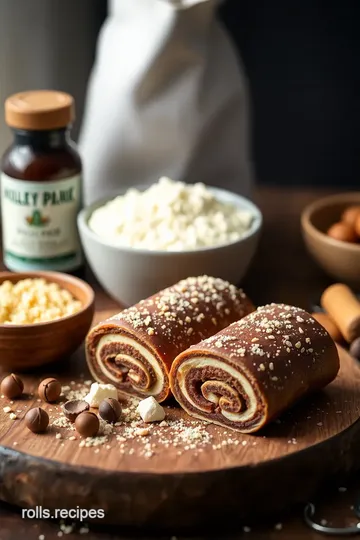
The combination of soft, fluffy roll, oozing hazelnut spread, and a drizzle of chocolate glaze? let’s just say it’s a game changer in the dessert department.
Whether you're throwing together a brunch or just want a treat for yourself (which i fully support), these rolls are a surefire hit.
The Joy of Rolling into History
Let me give you a quick history lesson on these sweet rolls. they originate from the charming bakeries of europe, where pastries are a national treasure! european bakers have mastered the art of creating decadent pastries that showcase rich flavors and playful fillings.
Fast forward to today, and this recipe has become a staple in american kitchens, especially during holiday baking ideas or for brunch gatherings.
Curious about the effort? well, this recipe takes about two hours total — prep and baking time included. sure, there are a few steps, but it’s not rocket science.
If i can do it, so can you! trust me, it’s medium in difficulty but oh-so-rewarding because you’ll end up with a dozen rolls that could easily charm anyone.
Plus, let’s not forget the cost…it'll land you right around $10 depending on what you already have in the pantry! not too shabby for homemade baked goods with chocolate , right?
Why You Need These Rolls in Your Life
Now, let’s talk benefits because these rolls are not just tasty — they’re packed with goodies. first off, hazelnuts are a nutritional powerhouse.
They’re loaded with protein and healthy fats, making these rolls not just a treat but also a comfort food that doesn’t make you feel guilty.
Plus, they’re perfect for special occasions. can you imagine whipping these out during a family gathering or a holiday brunch? you’ll be the star of the show!
One of the unique selling points of this chocolate roll recipe is its chocolate and hazelnut fusion . it’s essentially a love story in dessert form.
The richness of the chocolate blends beautifully with the nuttiness of hazelnuts, creating a flavor balance that’s hard to replicate in similar recipes.
Let’s keep it real: there are a bazillion sweet roll recipes out there, but few hit quite like these. they’re fluffy, chocolatey, and the glaze? oh my gosh! it just ties everything together like that cute bow on a gift.
Making homemade chocolate rolls means you can control the ingredients, making them a little less indulgent and a lot more satisfying.
Taking the First Step Towards Sweetness
So, now that you've got the scoop on why you need to bake chocolate rolls with hazelnut delight , let’s dive into the ingredients that’ll make it all happen.
Think of this as the foundation to creating that snug, chocolatey hug in roll form! are you ready? let’s not keep the deliciousness waiting any longer.
Essential Ingredients Guide
Baking is all about using the right ingredients, right? especially when you're gearing up to bake chocolate rolls with hazelnut delight .
If you’ve ever been in the kitchen fumbling around, trying to remember how to measure flour or what a pinch really means, you know it can be a bit of a mess sometimes.
Let's get into the nitty-gritty of what you need to whip up those decadent treats!
Premium Core Components
First off, let’s talk about the ingredients you’ll want to have on hand. Here's a quick cheat sheet!
-
All-purpose flour: you can’t go wrong with 4 cups (500g) of this wonder. to check quality, make sure it feels soft and has a fine, powdery texture.
Store it in a cool, dry place, and it’ll last about a year.
-
Yeast: gotta love that bubbly magic! you need 1 packet (2 1/4 tsp or 7g) . look for those little granules to be fresh—if they foam up in warm milk, you’re golden! store it in the fridge if you don’t use it all; it can last for months.
-
Brown Sugar: You’ll be using 1/2 cup (100g) . Soft and slightly sticky, it should smell sweet and caramel-like. Keep it in an airtight container to avoid the dreaded hard clump!
-
Unsalted Butter: You’ll need 1/4 cup (60g) melted. Fresh butter has a light smell, not bad or sour. Refrigerate it; it has a shelf life of a few months.
And let’s not forget those pantry staples like salt, cocoa powder, and oh, that hazelnut spread! Hazelnut, my friend , is where the magic happens in your filling!
Signature Seasoning Blend
Next up, flavors! You’ll want to mix it up with some spices and herbs. Cocoa powder and vanilla extract are key players here.
For general spice combinations, think cinnamon and nutmeg . they give warmth to your baked goods. and feel free to get creative with spices like cardamom or even a pinch of sea salt for that sweet and salty combo.
Smart Substitutions
Sometimes, we run out of something or can’t have certain ingredients. It’s all good! Here are some common swap-outs:
-
No hazelnut spread? Use peanut butter or almond spread! Doesn’t have the same richness but will still taste fab.
-
Want it gluten-free? You can always switch out that all-purpose flour for a gluten-free blend. Just be careful with the measurements—different flours can behave differently.
-
Milk alternatives: If you’re dairy-free, any plant-based milk works!
Kitchen Equipment Essentials
Now, let’s get into the tools. Here’s what you’ll need to conquer your kitchen:
- Mixing bowls : A must-have for combination magic.
- A whisk : For making mixes fluffy and well combined.
- Rollin’ pin : Essential for flattening that dough out perfectly.
- Baking sheets : Because where else would those divine rolls go?
For storage, think airtight containers for keeping your dry goods fresh, as well as zip-top bags for storing the rolls if you have extras.
So, whether you're a pro in the kitchen or just starting out, understanding these essential components will take your baking game to another level.
Who wouldn’t want to serve up fluffy rolls packed with chocolatey goodness that could bring a smile to anyone's face?
Ready to dive in? Let’s move on to those delicious step-by-step instructions to create your perfect chocolate roll recipe . Trust me; you’ll be glad you did!
The Art of Professional Cooking: Mastering Techniques for Sweet Success
Okay, friends, let’s dive into some essential steps for professional cooking that will level up your time in the kitchen.
It’s not rocket science but honing your skills sure can make you feel like a culinary superhero. today, we’re focusing on one of my all-time favorites: bake chocolate rolls with hazelnut delight .
Trust me, there's something magical about that chocolate and hazelnut fusion.
Essential Preparation Steps
Mise en place is a fancy term, isn’t it? it just means "everything in its place." before you even think about mixing anything, gather all your ingredients.
I promise it’ll save you from that moment of panic when you realize you’ve run out of cocoa powder.
Time management is crucial too. if you’ve got a million things in your head like i usually do, it’s good to break the whole process into parts.
For this recipe, you'll want to measure out your ingredients first while your yeast is doing its magic in warm milk (about 110° f/ 43° c) .
When it comes to organization , i like to keep my workspace tidy. putting used utensils in a bowl as i go not only keeps your work area clean but also makes you feel like a rockstar chef.
And safety? always remember to keep that workspace free of clutter. nobody wants to slip on some flour and fall flat!
Step-by-Step Process
Let's get right to it! Here’s how to create those incredible sweet roll baking masterpieces, step by step.
-
Prepare the Dough
- Combine 1 cup of warm milk with a packet of active dry yeast and let it sit for 5 minutes . It should be nice and foamy. If not, your yeast might be a dud!
- While that’s happening, whisk together 4 cups of flour, 1/2 cup sugar, and 1/2 tsp salt.
- Once the yeast is foamy, mix in 1/4 cup melted butter and 2 large eggs.
- Add the dry ingredients slowly. Stir until you have a lovely dough. Knead it for 5- 7 minutes and then let it rise in a warm spot for 30 minutes .
-
Fill It Up
- Combine that 1 cup hazelnut spread , some chopped hazelnuts, and 1/4 cup cocoa powder for filling. Smells divine!
-
Roll with It
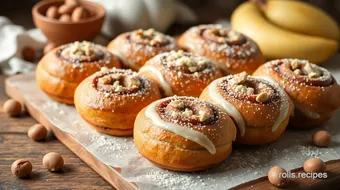
- Preheat your oven to 350° F ( 175° C) . Roll out your dough, spread the filling, roll it up, and slice into 12 rolls .
-
Bake It to Perfection
- Place your rolls on a parchment-lined sheet, let them rise for 20 minutes and bake them for 20- 25 minutes until they’re golden brown.
-
Glaze It!
- For the glaze, whisk together 1/2 cup powdered sugar and a splash of milk. If you're feeling extra chocolatey, add cocoa powder for a chocolate glaze.
Expert Techniques
Now, let’s tutor those more advanced techniques. when kneading, you want your dough to be smooth and elastic. if it's sticky, sprinkle a little more flour — but not too much, or you'll lose that fluffy feel! and about those quality checkpoints : be sure to check your rolls in the oven at the 20-minute mark to ensure they don’t overbake.
For troubleshooting , if the rolls didn’t rise, it might have been your yeast—double-check that it’s still alive. if it’s a little dry after baking, a tiny brush of melted butter on top can work wonders.
Success Strategies
Oh, the mistakes—i’ve made them all! don't skip the resting times. trust me; patience pays off in fluffy, gorgeous rolls.
Aim for the perfect texture by making sure your dough rises enough times.
If you want to make these ahead of time, my pro tip? after assembling, cover those bad boys and pop them in the fridge overnight.
The next day, just let them warm up before baking. easy peasy!
As you get ready to roll with these homemade chocolate rolls, remember this isn’t just about following a chocolate roll recipe ; it’s about enjoying the process.
And wow, does it satisfy that sweet tooth!
Additional Information
To learn more about making the best from scratch, explore the world of hazelnut dessert recipes ! Bake away, friends, and let those sweet scents fill your home.
Unlocking the Secrets of Bake Chocolate Rolls with Hazelnut Delight
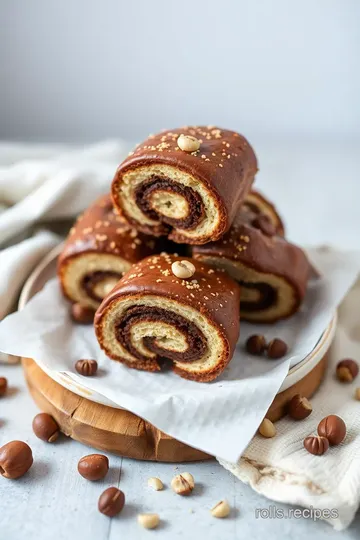
When it comes to sweet breakfast rolls , nothing beats the joy of biting into a freshly baked roll that’s bursting with flavor.
Trust me, once you tackle this recipe for bake chocolate rolls with hazelnut delight , you'll be the star of the brunch table.
Not to mention, it’s the perfect excuse for a cozy afternoon baking session!
Pro Tips & Secrets
Okay, let me share some pro tips to make your baking adventure smoother. first up, let your dough rise properly.
You want it fluffy and light, not dense and sad. give it the time it deserves, usually about 30 minutes .
This is crucial for that fluffy roll recipe effect!
For that extra flavor enhancement , think about adding a splash of vanilla extract to your dough. it’s like a little hug for your taste buds! when it comes to the filling, why not toss some chocolate chips in there? it’s a chocolate fusion that people will rave about.
Want to save some time? make the dough and filling ahead of time. you can store it in the fridge overnight, then roll and bake it in the morning.
It’s almost like a chocolate breakfast idea served up fresh!
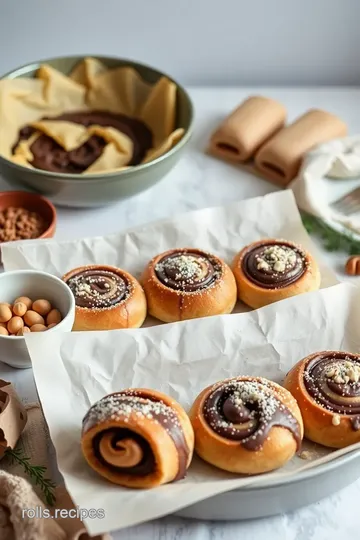
Perfect Presentation
We all eat with our eyes first, right? so, let’s make sure those rolls look as good as they taste.
Try plating them in a circle on a large platter, with the glaze drizzled on top. this presentation will scream, “i’m fancy!”
You can also sprinkle some finely chopped hazelnuts on the glaze for that crunch factor. and hey, don’t forget color combinations! a side of fresh berries adds beautiful color and balances the richness of the hazelnut pastries .
Who doesn't love a pop of berry red against those chocolatey rolls?
Storage & Make-Ahead
Now, if you manage to have any leftovers (i mean, who are we kidding?), here’s how to store your homemade chocolate rolls .
Let them cool completely and then wrap them tightly in plastic wrap or foil. they’ll last in the fridge for about 3 days .
When it’s reheating time, pop them in a 350° f oven for about 5- 10 minutes. they'll come back to life! or, if you’re feeling a bit lazy, use the microwave but do it in 10-second bursts to avoid those sad, soggy rolls.
Creative Variations
Now, let’s get creative! if you want a twist, try swapping the hazelnut spread with some almond butter or even a caramel glaze.
The options are endless! you could also experiment with seasonal twists by adding pumpkin puree in the dough around fall.
Heck, it’s a great convo starter for the holidays, too!
Also, if you’re catering to dietary restrictions, you can try gluten-free flour or a dairy-free spread. It’s all about making these decadent pastries work for everyone!
Complete Nutrition Guide
Now for the nutritional rundown . each of these rolls is about 320 calories , packed with a nice balance of carbs and fats (thanks to that yummy hazelnut filling!).
They’re definitely not the calorie-friendly treats you might find on a strict diet, but hey—we’re here for comfort food desserts, am i right?
If you’re concerned about portion size, grab a friend and share! That way, you both get to enjoy without feeling guilty about those indulgent bites.
Expert FAQ Solutions
You know you’ll eventually wonder if you can freeze these babies. yes, you absolutely can! just freeze them before icing, and when you’re ready, let them thaw and add that glaze only when you serve.
If you’ve got any mishaps, like the dough not rising, double-check your yeast. it should be fresh and bubbly! if you messed up on the filling, just remember— all is fair in chocolate and hazelnuts .
Get back in the kitchen, friends! with these insider tips and a sprinkle of creativity, you’ll be whipping up bake chocolate rolls with hazelnut delight like a pro.
Whether it’s a rainy day or a sunny brunch, these rolls are the comfort you need. so, dust off that apron and let’s create something delicious together!
Bake Chocolate Rolls with Hazelnut Delight Card
⚖️ Ingredients:
- 4 cups (500g) all-purpose flour
- 1/2 cup (100g) granulated sugar
- 1 packet (2 1/4 tsp or 7g) active dry yeast
- 1/2 tsp salt
- 1 cup (240ml) warm milk (about 110°F/43°C)
- 1/4 cup (60g) unsalted butter, melted
- 2 large eggs
- 1 cup (240g) hazelnut spread (e.g., Nutella)
- 1/2 cup (75g) finely chopped hazelnuts
- 1/4 cup (50g) cocoa powder
- 1/2 cup (60g) powdered sugar
- 2-3 tbsp (30-45ml) milk or water
- 2 tbsp (30g) cocoa powder (optional, for chocolate glaze)
🥄 Instructions:
- Step 1: In a mixing bowl, combine warm milk and yeast. Let sit for 5 minutes until foamy.
- Step 2: In a large bowl, whisk together flour, sugar, and salt.
- Step 3: Add melted butter and eggs to yeast mixture. Mix well.
- Step 4: Gradually add dry ingredients into wet mixture, stirring to combine.
- Step 5: Knead dough on a floured surface for about 5-7 minutes until smooth.
- Step 6: Place dough in a greased bowl, cover, and allow to rise in a warm place for 30 minutes.
- Step 7: In a small bowl, mix hazelnut spread, chopped hazelnuts, and cocoa powder until smooth.
- Step 8: Preheat the oven to 350°F (175°C).
- Step 9: Roll out the dough on a floured surface into a large rectangle.
- Step 10: Spread the filling evenly over the dough.
- Step 11: Roll the dough tightly into a log from one long side.
- Step 12: Cut the log into 12 evenly thick rolls.
- Step 13: Place rolls on a parchment-lined baking sheet, spacing them apart.
- Step 14: Cover and let rise for 20 minutes.
- Step 15: Bake in preheated oven for 20-25 minutes or until golden brown.
- Step 16: In a bowl, whisk powdered sugar, cocoa powder (if using), and milk until smooth and pourable.
- Step 17: Drizzle glaze over warm rolls. Serve immediately or store for later.
Previous Recipe: How to Bake Brown Butter Cinnamon Rolls: Irresistible Comfort
Next Recipe: How to Bake Coffee Cinnamon Rolls with Creamy Frosting: A Cozy Delight