Easy Cheesy Hawaiian Rolls with Garlic Butter
Try my Easy Cheesy Hawaiian Rolls with Garlic Butter for a flavorful twist on the classic! Perfect for holidays or cozy dinners. Get the recipe!

- The Joy of Baking: Easy Cheesy Hawaiian Rolls with Garlic Butter
- Your Essential Ingredients Guide to Perfect Easy Cheesy Hawaiian Rolls with Garlic Butter
- Professional Cooking Method: The Art of the Kitchen
- Pro Tips & Secrets to Nail the Easy Cheesy Hawaiian Rolls with Garlic Butter
- Perfect Presentation for Maximum Wow Factor
- Storage & Make-Ahead Tips
- Creative Variations to Jazz Things Up
- Complete Nutrition Guide
- Wrap It Up
- Frequently Asked Questions
- Recipe Card
The Joy of Baking: Easy Cheesy Hawaiian Rolls with Garlic Butter
Oh my gosh, do you remember the first time you tried those sweet hawaiian rolls? you know, the ones that practically melt in your mouth? i was at a family barbecue, and someone brought a basket stacked high with those sweet hawaiian bread beauties.
I had no idea they could get any better until i discovered the magic combo of garlic butter and cheesy goodness .
Seriously, every bite of these easy cheesy hawaiian rolls with garlic butter feels like a warm hug. they're not just rolls; they're comfort food that brings a smile to your face, especially if you're gathering with friends or family.
Punching Up Tradition
Hawaiian rolls have an interesting history. they originated in hawaii, made with a sweet, soft bread that's become a staple in american households.
Over the years, they've taken the spotlight in various family-friendly recipes and transformed into unforgettable party appetizers. today, these rolls are all about modern indulgence, especially when you add gooey, cheesy goodness and a swirl of aromatic garlic butter!
Now, i have to say, this recipe is super easy —trust me, if you've ever hesitated to bake at home, you can totally handle this one.
In just about an hour, you can whip up a batch of these soft, fluffy rolls that yield about 12 delicious pieces.
It's perfect for a quick dinner or a savory side dish at your next gathering. and don't get me started on the cost! it’s budget-friendly, making it easy to enjoy comfort food without breaking the bank.
Why You'll Love These Rolls
Okay, let’s talk about the perks. first off, these rolls are not just tasty; they pack a nutritional punch too! with all those wholesome ingredients, you get a little sweetness from the dough and a hit of protein from that ooey-gooey cheese.
Who doesn’t want a delicious way to get their carbs and calcium in? plus, they’re a hit for special occasions—nothing says “party” like a platter of cheese-filled hawaiian rolls .
What i love most about these rolls is their versatility. you can serve them at a family gathering, make them the main star at game day, or even enjoy them as a late-night snack.
Honestly, they are just the ticket for any event, be it a holiday feast or a simple thursday night dinner.
You can dress them up with some fun toppings or serve them plain, and they remain a showstopper!
Making Your Own Homemade Rolls
The best part? you get to look like a baking genius without breaking a sweat. this easy roll recipe walks you through the process with step-by-step instructions, so there’s no guessing.
And if you're wondering about those baked rolls with cheese —the aroma wafting through your kitchen while they're in the oven? it’s pure bliss.
Before we dive into the ingredients, let me give you a quick tip. don’t rush the rising times. give that dough the love it deserves to become those soft, fluffy rolls we all crave.
And while baking, feel free to experiment with different herbs or even spices to make these rolls uniquely yours.
Now that you're ready to fall in love with delicious garlic rolls , let's gather our ingredients and kick off this baking adventure! whether you’re a seasoned pro or a newbie in the kitchen, these rolls are gonna win your heart over.
Grab those measuring cups, and let’s get started on our journey to cheesy garlic bliss !
Your Essential Ingredients Guide to Perfect Easy Cheesy Hawaiian Rolls with Garlic Butter
So, you want to whip up some easy cheesy hawaiian rolls with garlic butter ? you’re in for a treat! these rolls are like a cozy hug for your taste buds, combining that soft, fluffy texture with the totally irresistible cheese and garlic combo.
Imagine serving these at a family gathering or party; they’d be gone in minutes! but, before you dive in, let’s break down some essential ingredients and tips to ensure your baking is a success.
Premium Core Components
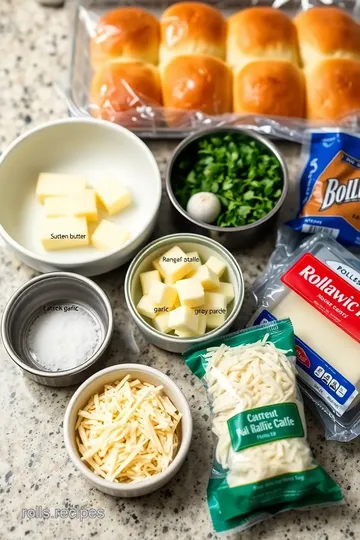
First things first, let’s talk about your core ingredients . For the dough, you’re gonna need:
- 3 cups of all-purpose flour (360 g)
- 1/4 cup of granulated sugar (50 g)
- 1 packet (2 1/4 tsp or 7 g) of instant yeast
- 1 teaspoon of salt
- 3/4 cup of warm whole milk (180 ml)
- 1/4 cup of melted unsalted butter (60 g)
- 2 large eggs
Freshness Tip : Always check the expiration dates on your yeast and flour. Fresh yeast equals fluffy rolls!
When you combine all these ingredients, you’ll create a dough that rises beautifully. Storage is key here; keep any extra in an airtight container in a cool, dry place and it can last for months!
Signature Seasoning Blend
Alright, so onto flavor! It’s all about that signature seasoning blend . For my rolls, you need:
- 1 cup of shredded mozzarella cheese
- 1/2 cup of shredded cheddar cheese
Now, i like to add a punch of flavor with garlic! mix together 1/2 cup of melted unsalted butter , 3 cloves of minced garlic , and 2 tablespoons of chopped parsley for that garlic butter heaven.
Quality Indicator : Fresh garlic should be firm and not sprouting. Trust me, it makes a world of difference!).
Smart Substitutions
You might not always have everything on hand—don’t sweat it, my friend! if you run out of flour, bread flour works wonders in this recipe.
Want it dairy-free? swap the whole milk for coconut milk .
Emergency Replacement : Out of mozzarella? No biggie! Try a different cheese. Monterey Jack or even a spicy pepper jack will work.
Kitchen Equipment Essentials
Now, moving onto gear. You don’t need a fancy kitchen to make these rolls. Grab a few essentials:
- Mixing bowls
- Measuring cups and spoons
- A good mixing spoon or spatula
- A 9x13 inch baking pan (this is where the magic happens)
- A clean kitchen towel (to cover your rolls while they rise)
Look, it doesn’t take much to make the best baked rolls. You just need these tools and a little patience!
Bonus Tips for Success
When it comes to baking tips , here are a few nuggets I’ve learned:
- Use warm milk (not boiling) to help activate your yeast nicely.
- Don’t rush the rising times! Letting the dough sit and rise truly transforms it into those delightful soft fluffy rolls.
- A little overnight fridge time for the prepared rolls? Yes, please! Bake them fresh in the morning (talk about a treat!).
- Keep an eye on your rolls while they bake. Every oven is a bit different, and you want that golden brown finish.
Wrapping It Up
So, now you have the knowledge to make your own delicious garlic rolls that’ll wow everyone. these easy cheesy hawaiian rolls with garlic butter aren’t just a side dish; they’re the perfect party appetizer rolls! whether paired with a salad or enjoyed solo, each bite bursts with flavor.
In a bit, i'll share the step-by-step instructions that'll guide you right into deliciousness. trust me, once you make these homemade rolls, you won’t ever want to go back to store-bought.
So, grab those ingredients and let’s get rollin'!

Professional Cooking Method: The Art of the Kitchen
When it comes to cooking, we all want to create something special. You know those moments when food just feels right? That's where professional cooking methods come into play!
Essential Preparation Steps
Before diving into our easy cheesy hawaiian rolls with garlic butter , let's take a moment to get prepared. think of mise en place as the kitchen equivalent of getting your ducks in a row.
It’s about having everything measured and ready to roll. trust me, you'll thank yourself later. picture your flour, sugar, yeast, and soft butter lined up, all cute and waiting for their moment to shine.
Time management tips are also key here. set a timer while your dough is rising! for these rolls, we’re looking at a solid 30 minutes for that first rise, and it can feel like forever if you’re not preoccupied.
Use that time to clean up or prep your garlic butter.
And as we're organizing, don’t forget about safety ! when dealing with hot ovens and melting butter, keep a cool head.
Remember: hot surfaces and hot contents mean potential burns. always use those oven mitts, or you might just end up with a case of "what was i thinking?"
Step-by-Step Process
Now, let's break down the cooking in some clear steps.
-
Prepare the dough: mix your dry ingredients first: 3 cups of all-purpose flour , 1/4 cup of sugar , and that instant yeast .
In another bowl, whisk together the warm milk, melted butter, and eggs.
-
Kneading: It’s time to dive in! Knead the dough for around 5 minutes until it’s all smooth. Don’t worry about looking like a total mess; that dough is going to rise beautifully!
-
First rise: put that freshly kneaded dough in a greased bowl, cover it, and let it rise in a warm spot for about 30 minutes .
It should double in size, and if it's a little sluggish, give it a gentle pep talk.
-
Shape the roles: once your dough has risen, you’ll punch it down (yeah, it sounds rough, but it’s all in good fun!).
Cut it into 12 equal pieces, flatten them, and load up on that gooey cheese filling before rolling them into cute little balls.
-
Second Rise: This step’s vital! Let your rolls rest for an additional 15 minutes . Let them puff up while you preheat the oven to 350° F .
-
Baking: pop those rolls in the oven and bake for 15 minutes . you’re looking for that golden-brown perfection. keep an eye on ‘em, though! every oven has a personality of its own.
-
Garlic Butter: While the rolls bake, whip up a garlicky delight. Combine melted butter, minced garlic, and parsley to make your kitchen smell inviting.
-
Finishing Touch: Brush that garlic butter all over the fresh-out-of-the-oven rolls. Oh. My. Gosh. Is there anything better than warm buttery garlic rolls? I doubt it!
Expert Techniques
Alright, let’s get savvy here! when you’re trying out this hawaiian rolls recipe , keep some quality checkpoints in mind.
The rolls should be golden before you pull them out. if they look pale, give ‘em a few more minutes.
Oh, and a little troubleshooting tip: if your rolls don’t rise, the yeast might be stale. Always check the expiration date!
Success Strategies
We’ve all made mistakes in the kitchen, and honey, that’s okay. One major blunder? Not letting the dough rise enough. Seriously, do the rise dance! Those fluffy rolls are counting on you.
Quality assurance? Take a bite of one before serving. If they’ve got that soft texture and cheesy goodness, you’re golden.
Want to work ahead? These rolls can sit in the fridge overnight! Shape them, pop them in a fridge, and bake them fresh in the morning. Talk about a game-changer for brunch!
Additional Information
Cooking isn’t just about following recipes; it’s about experimenting, learning, and enjoying the process. so go ahead and impress your friends and family with those delicious garlic rolls .
With just a little patience and the right methods, you can whip up these easy cheesy hawaiian rolls with garlic butter that are sure to steal the show.
Happy baking, friend!

Pro Tips & Secrets to Nail the Easy Cheesy Hawaiian Rolls with Garlic Butter
Alright, let’s dive into some pro tips that will take your easy cheesy hawaiian rolls with garlic butter to the next level.
Trust me, i’ve made my fair share of rolls that didn’t quite rise or turned out doughy, so you're not alone!
First off, don’t rush the yeast! it’s like a good friend – it needs time to activate. warm your milk to about 110° f –you want it cozy, not scalding.
Instant yeast is pretty forgiving, but starting it off right makes all the difference.
Another gem? knead that dough for about 5 minutes until it’s smooth. it’s a bit of a workout, but nothing beats the satisfaction of soft, fluffy rolls.
If you find the dough sticky, sprinkle just a tad of flour, but don’t go overboard. keep it moist for that perfectly fluffy texture.
Let’s talk flavor enhancement. When you combine the melted butter and garlic, sprinkle in some fresh parsley. It’s not just about looks; that pop of green adds a bright flavor! For an extra kick, toss in a pinch of red pepper flakes—your taste buds will thank you!
And let’s not forget presentation, folks! when you plate these rolls, brush them generously with that luscious garlic butter. the way the butter glistens gives those rolls a gourmet feel, making them perfect for a party appetizer or a cozy family dinner.
Perfect Presentation for Maximum Wow Factor
Speaking of presentation, it’s easier than you think! after brushing your garlic butter rolls with melted butter, consider adding a sprinkle of flaky sea salt.
Not only does it look pretty, but it also boosts the overall flavor. you want your rolls to look as good as they taste!
Color is key, so pair your rolls with a vibrant salad or some roasted veggies. picture this: golden-brown rolls next to crisp greens.
It’s a feast, both for the eyes and the stomach!
If you’re feeling fancy, individual serving ideas really shine at gatherings. try placing a roll in a small dish with a dollop of herb-infused olive oil or a little marinara.
This simple touch says, “i know what i'm doing!”
Storage & Make-Ahead Tips
Now, let’s chat about storage. these rolls are the ultimate comfort food, but you might not finish them all in one go.
If you’ve got leftovers (which i’m guessing you might not, let’s be real), store them in an airtight container at room temperature.
They should stay fresh for about 2-3 days .
If you want to prep in advance, you can totally make these bad boys ahead of time! after shaping the rolls, cover them and chill in the fridge.
Take them out about 30 minutes before baking to come back to room temperature. how convenient is that?
When it comes to reheating, pop them in a preheated oven at 350° f for about 5- 10 minutes or until warm.
If you're feeling wild, brush on a little more garlic butter—like we needed an excuse, right?
Creative Variations to Jazz Things Up
One of the best things about this hawaiian rolls recipe is that you can really make it your own! want a twist? swap out that mozzarella for a smoky gouda or spicy pepper jack.
Trust me, it’s a game-changer.
If you’re looking for dietary modifications, go for dairy-free cheese . use coconut or almond milk instead of whole milk for a lighter version, while still keeping the softness that's signature to these rolls.
Feeling seasonal? Toss in some bright herbs in spring or maybe a sprinkle of cinnamon for fall vibes. The sky's the limit with roll variations!
Complete Nutrition Guide
Okay, let’s break down what you’re serving up with these tasty rolls. each roll comes in at around 210 calories, with 6 grams of protein.
So, you get those gooey, cheese-filled hawaiian rolls without feeling too guilty!
Not to mention, the sweet and savory combo is a big win for a well-rounded meal. they pair perfectly with a protein like chicken or a hearty veggie dish, making it easy to whip up a satisfying dinner without losing your mind in the kitchen.
Wrap It Up
So there you have it, friends! whether you’re making these easy cheesy hawaiian rolls with garlic butter for a special occasion or just a cozy night in, these rolls are bound to be a hit.
Embrace the art of roll-making, and don’t be afraid to experiment a little. after all, cooking should be fun, right?
With a little patience and these tips, you’ll be the star baker at your next gathering, and your friends will be begging for the recipe.
Just remember, the joy is in sharing good food and good company. happy baking!
Frequently Asked Questions
What are Easy Cheesy Hawaiian Rolls with Garlic Butter?
Easy Cheesy Hawaiian Rolls with Garlic Butter are soft, fluffy rolls inspired by traditional Hawaiian sweet rolls, enhanced with gooey cheese and flavored with aromatic garlic butter. They make for a delightful side dish or a treat on their own, perfect for gatherings and family meals.
Can I make Easy Cheesy Hawaiian Rolls with Garlic Butter ahead of time?
Yes, you can prepare the dough and shape the rolls a day in advance. After shaping, cover the rolls tightly and store them in the refrigerator overnight. The next day, allow them to come to room temperature before baking for the best results.
What can I substitute for the cheeses in the filling?
You can easily substitute the mozzarella and cheddar cheeses with other varieties like Monterey Jack, pepper jack, or even a blend of Italian cheeses. Feel free to experiment with your favorite cheese combinations to suit your taste!
How should I store leftover Easy Cheesy Hawaiian Rolls with Garlic Butter?
Store any leftover rolls in an airtight container at room temperature for up to 2 days. For longer storage, wrap them tightly in plastic wrap and place them in the freezer, where they can last for up to a month. Reheat in the oven for a few minutes to regain their softness.
Can I make these rolls without dairy?
Absolutely! You can use coconut milk or any other plant-based milk as a substitute for whole milk, and choose dairy-free cheese for the filling. Just ensure that your plant-based butter is suitable for your dietary needs, and you’ll have delicious dairy-free rolls!
What tips can you share for perfecting Easy Cheesy Hawaiian Rolls with Garlic Butter?
For perfect rolls, ensure your ingredients are at room temperature, particularly the milk, as this helps activate the yeast properly. Don’t rush the rising time; allowing the dough to rise adequately will give you that fluffy texture. Lastly, brush on the garlic butter generously for an irresistible finish!
Easy Cheesy Hawaiian Rolls with Garlic Butter Card

⚖️ Ingredients:
- 3 cups all-purpose flour
- 1/4 cup granulated sugar
- 1 packet instant yeast (2 1/4 tsp or 7 g)
- 1 tsp salt
- 3/4 cup whole milk, warmed
- 1/4 cup unsalted butter, melted
- 2 large eggs
- 1 cup shredded mozzarella cheese
- 1/2 cup shredded cheddar cheese
- 1/2 cup unsalted butter, melted for garlic butter
- 3 cloves garlic, minced
- 2 tbsp fresh parsley, chopped (optional)
- 1/2 tsp salt (to taste)
🥄 Instructions:
- Step 1: In a large mixing bowl, combine flour, sugar, instant yeast, and salt.
- Step 2: In another bowl, whisk together warm milk, melted butter, and eggs.
- Step 3: Pour the wet ingredients into the dry ingredients and mix until combined.
- Step 4: Transfer dough to a lightly floured surface and knead for about 5 minutes until smooth.
- Step 5: Place the dough in a greased bowl, cover with a towel, and let rise in a warm area for 30 minutes or until doubled in size.
- Step 6: In a bowl, combine mozzarella and cheddar cheese. Set aside.
- Step 7: Punch down the dough and divide it into 12 equal portions.
- Step 8: Flatten each piece, add a generous amount of cheese filling, and shape it into a ball.
- Step 9: Place the rolls seam side down in a greased 9x13 inch baking pan.
- Step 10: Cover the rolls with a towel and let them rise for an additional 15 minutes until puffy.
- Step 11: Preheat the oven to 350°F (175°C) and bake rolls for 15 minutes, or until golden brown.
- Step 12: While rolls are baking, mix melted butter, minced garlic, parsley, and salt in a bowl.
- Step 13: Remove rolls from the oven and immediately brush with garlic butter. Serve warm.
Previous Recipe: Delicious Baked Spinach Lasagna Rolls with Creamy Parmesan Sauce
Next Recipe: Warm & Flaky Bake Apple Turnovers: Quick & Delicious Treats Your Family Will Love